Category: Vape Knowledge

  • Lost Vape Grus Review – A Diamond In the Grus?

    Lost Vape Grus Review – A Diamond In the Grus?

    [et_pb_section fb_built="1" theme_builder_area="post_content" _builder_version="4.25.0" _module_preset="default" background_color="#000000" hover_enabled="0" sticky_enabled="0"][et_pb_row _builder_version="4.25.0" _module_preset="default" theme_builder_area="post_content"][et_pb_column _builder_version="4.25.0" _module_preset="default" type="4_4" theme_builder_area="post_content"][et_pb_image _builder_version="4.25.0" _module_preset="default" theme_builder_area="post_content" alt="lost vape" src="http://headless.local/wp-content/uploads/2024/05/z100a1.webp" align="center" hover_enabled="0" sticky_enabled="0"][/et_pb_image][et_pb_text _builder_version="4.25.0" _module_preset="default" theme_builder_area="post_content" hover_enabled="0" sticky_enabled="0"]

    Lost Vape Grus Review – A Diamond In the Grus?

    /in News/by Administrator

    [/et_pb_text][et_pb_text _builder_version=”4.25.0″ _module_preset=”default” theme_builder_area=”post_content” hover_enabled=”0″ sticky_enabled=”0″]

    A very smart looking single battery 100w mod so is this one for the vaping gurus?

    The Lost Vape Grus review, and is it a bird a plane or a super sexy vape device?

    It turns out a Grus is some kind of bird from the crane family, so calling a device ‘Grus’ makes absolutely no sense! But hey, this is vaping and the world of vaping is vast and spectacular.

    [/et_pb_text][et_pb_image _builder_version="4.25.0" _module_preset="default" theme_builder_area="post_content" alt="lost vape" src="http://headless.local/wp-content/uploads/2024/05/LostVape-Grus-in-hand-3.webp" hover_enabled="0" sticky_enabled="0"][/et_pb_image][et_pb_text _builder_version="4.25.0" _module_preset="default" theme_builder_area="post_content" hover_enabled="0" sticky_enabled="0"]

    Lost Vape make very good devices, particularly known for high quality and not as well known for tanks and rebuildables.

    The Orion range of pod systems always come to mind when I think of Lost Vape but most recently, the Lost Vape Centaurus DNA250c is what really comes to mind.

    A fabulous dual battery device which is very high quality and although its over the £100 mark, its definitely worth the money in my opinion.

    Single battery devices however are on a slight rise, especially with the use of a single 21700 battery, generally meaning higher wattage, and better battery life.

    Lets crack on and try out the Lost Vape Grus 100w Mod.

    What Can We Expect From The LostVape Grus 100w Mod?

    The Lost Vape Grus mod has pretty much all the features you could expect or want from a single battery device along with coming in a number of modern, and classic styles.

    Housing a battery as large as a 21700 does mean you compensate on portability but with a Zinc Alloy frame, USB Type-C Charge port, a large colour OLED display and a large enough 510 plate on top to fit a 30mm atomiser.

    [/et_pb_text][et_pb_image _builder_version="4.25.0" _module_preset="default" theme_builder_area="post_content" alt="lost vape" src="http://headless.local/wp-content/uploads/2024/05/LostVape-Grus-Box.webp" hover_enabled="0" sticky_enabled="0"][/et_pb_image][et_pb_text _builder_version="4.25.0" _module_preset="default" theme_builder_area="post_content" hover_enabled="0" sticky_enabled="0"]

    I’m pretty sure the Grus will suit a lot of different vapers.

    Inside the Box

    • 1 x Grus Mod
    • 1 x USB Type-C Cable
    • 1 x Warranty Card
    • 1 x User Manual

    Lost Vape Grus 100w – Specifications

    [/et_pb_text][et_pb_image _builder_version="4.25.0" _module_preset="default" theme_builder_area="post_content" alt="lost vape" src="http://headless.local/wp-content/uploads/2024/05/LostVape-Grus-box-exploded.webp" hover_enabled="0" sticky_enabled="0"][/et_pb_image][et_pb_text _builder_version="4.25.0" _module_preset="default" theme_builder_area="post_content" hover_enabled="0" sticky_enabled="0"]

    • Battery -Single 21700/20700 or 18650 with adaptor
    • Wattage Output – 5-100w
    • Up to 30mm atomizer without overhang
    • Output Modes: VW/VV/TC/NI/SS
    • Multiple Circuit Protections
    • Height: 94.6mm
    • Width: 40.5mm
    • Depth: 30.5mm

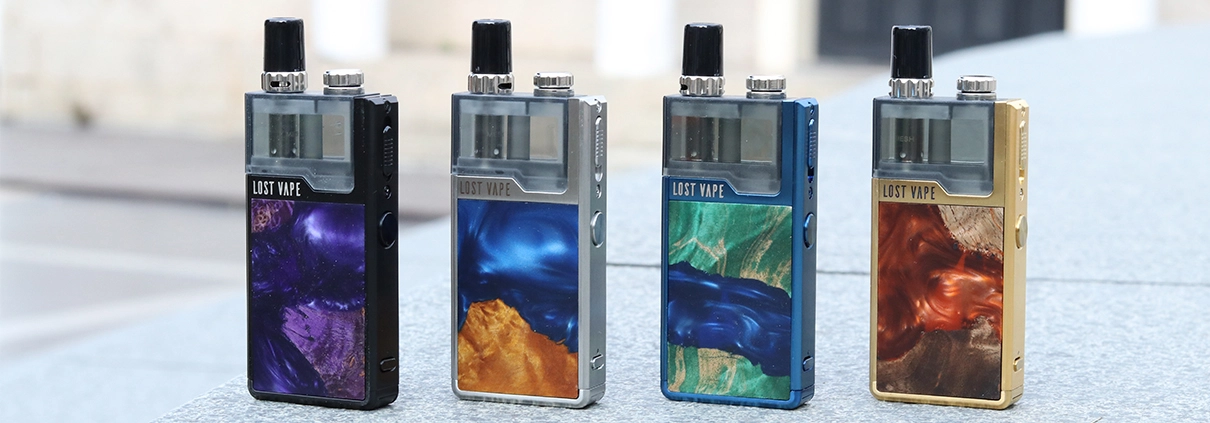
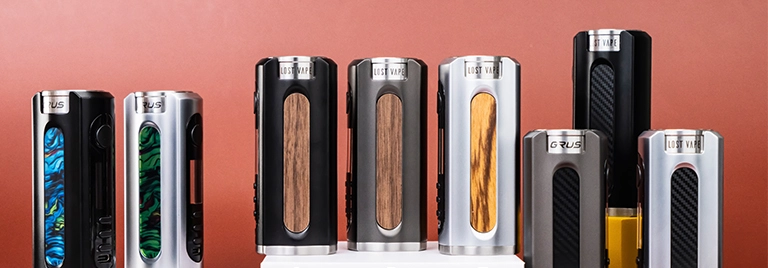
    The Lost Vape Grus comes in a Carbon, Wood and a Universe Series.

    All three series have a Stainless Steel, Gunmetal or Black frame with different style inner panels depending on the series you choose.

    [/et_pb_text][et_pb_image _builder_version="4.25.0" _module_preset="default" theme_builder_area="post_content" alt="lost vape" src="http://headless.local/wp-content/uploads/2024/05/lost_vape_grus_100w_box_mod_carbon_fiber_and_wood_series-e1603262244674.webp" hover_enabled="0" sticky_enabled="0"][/et_pb_image][et_pb_text _builder_version="4.25.0" _module_preset="default" theme_builder_area="post_content" hover_enabled="0" sticky_enabled="0"]

    Lost Vape Grus 100w Design and Build Quality

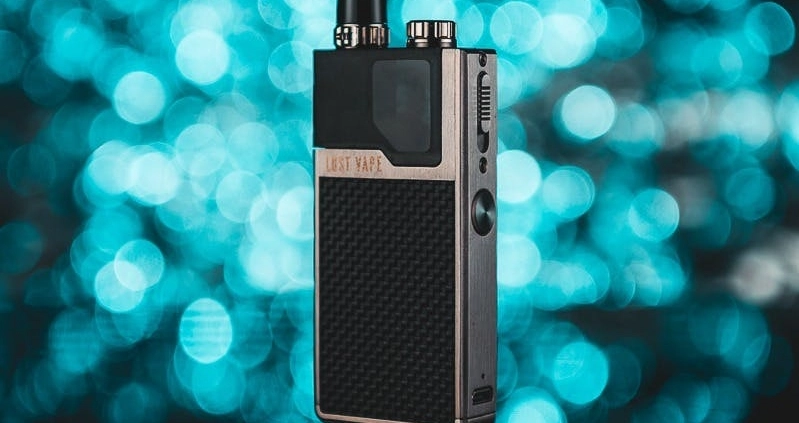
    I received the Black Carbon Fibre version of the Lost Vape Grus.

    The satin black finish is nice and smooth and fairly scratch resistant, and on either side of the device is a slim panel which in my case is real carbon fibre.

    [/et_pb_text][et_pb_image _builder_version="4.25.0" _module_preset="default" theme_builder_area="post_content" alt="lost vape" src="http://headless.local/wp-content/uploads/2024/05/LostVape-Grus-in-hand-2.webp" hover_enabled="0" sticky_enabled="0"][/et_pb_image][et_pb_text _builder_version="4.25.0" _module_preset="default" theme_builder_area="post_content" hover_enabled="0" sticky_enabled="0"]

    Surprisingly the 2 side panels are machined so well, when you run your finger across them you can barely feel the join between the black frame and the carbon fibre panels.

    I’m really impressed with the finish and quality of build with this device.

    Lost Vape Grus 100w In The Hand

    The Grus is quite tall for a single battery mod, but more surprising is the weight.

    It isn’t heavy, but its ‘weighty’ and solid in the hand.

    [/et_pb_text][et_pb_image _builder_version="4.25.0" _module_preset="default" theme_builder_area="post_content" alt="lost vape" src="http://headless.local/wp-content/uploads/2024/05/LostVape-Grus-face-display.webp" hover_enabled="0" sticky_enabled="0"][/et_pb_image][et_pb_text _builder_version="4.25.0" _module_preset="default" theme_builder_area="post_content" hover_enabled="0" sticky_enabled="0"]

    As both a thumb, or finger firer the Lost Vape Grus works very well and fits comfortably in the hand mostly thanks to the curvature of the device.

    On the one side is a clean smooth curve, and on the other curved end is the display, which is also curved very cleverly to blend into the device and sits nice and flush.

    Lost Vape Grus 100w Display

    An interesting slightly curved display with the Grus, which means if you don’t look at the display face-on, it almost feels like you’re looking into a fish tank.

    [/et_pb_text][et_pb_image _builder_version="4.25.0" _module_preset="default" theme_builder_area="post_content" alt="lost vape" src="http://headless.local/wp-content/uploads/2024/05/LostVape-Grus-100w-display.webp" hover_enabled="0" sticky_enabled="0"][/et_pb_image][et_pb_text _builder_version="4.25.0" _module_preset="default" theme_builder_area="post_content" hover_enabled="0" sticky_enabled="0"]

    However, the display is bright, clear and also has a nice option to change the display colour.

    LostVape Grus Basic Operation

    There are 3 buttons to worry about along with the fire button.

    Interestingly, the Grus doesn’t have a main menu as such, so all changes are made within the one screen.

    [/et_pb_text][et_pb_image _builder_version="4.25.0" _module_preset="default" theme_builder_area="post_content" alt="lost vape" src="http://headless.local/wp-content/uploads/2024/05/LostVape-Grus-7v-display-blue.webp" hover_enabled="0" sticky_enabled="0"][/et_pb_image][et_pb_text _builder_version="4.25.0" _module_preset="default" theme_builder_area="post_content" hover_enabled="0" sticky_enabled="0"]

    Here’s the basic steps for operation:

    • Device On – 5 click of Fire Button
    • Device Off – 5 Clicks of Fire button, then Centre Button
    • Change Power Mode – 1 Click of Centre button highlights Power Mode
    • Up Button – Voltage/Wattage/Temperature Up
    • Down Button – Voltage/Wattage/Temperature  Down
    • Up & Centre Button – Locks adjustment buttons. Will Still fire.
    • Press & Hold Centre Button – Change display colour.

    Lost Vape Grus Battery Housing

    The Grus uses what I would call the traditional threaded battery cap with a small latch that you can lift and unscrew the cap to access the battery housing.

    There are also 3 small holes in the cap for battery venting.

    [/et_pb_text][et_pb_image _builder_version="4.25.0" _module_preset="default" theme_builder_area="post_content" alt="lost vape" src="http://headless.local/wp-content/uploads/2024/05/LostVape-Grus-battery-door.webp" hover_enabled="0" sticky_enabled="0"][/et_pb_image][et_pb_text _builder_version="4.25.0" _module_preset="default" theme_builder_area="post_content" hover_enabled="0" sticky_enabled="0"]

    As much as some may say this is a painful way to house a battery, and for some who aren’t very dexterous they may struggle with this cap as the handle to screw and unscrew is quite small.

    But personally, I still think its one of the best ways to house a battery, more because it ensures a tight connection and there is nothing that concerns me more than loose connections…

    Being an electrician, I can promise you a loose connection causes more problems than you could imagine.

    [/et_pb_text][et_pb_image _builder_version="4.25.0" _module_preset="default" theme_builder_area="post_content" alt="lost vape" src="http://headless.local/wp-content/uploads/2024/05/LostVape-Grus-battery-housing.webp" hover_enabled="0" sticky_enabled="0"][/et_pb_image][et_pb_text _builder_version="4.25.0" _module_preset="default" theme_builder_area="post_content" hover_enabled="0" sticky_enabled="0"]

    Just ask one of the largest retailers in the UK who had 5 hours of downtime, costing them millions just because of a loose connection.

    Yep…I was the fool who had to fix it and explain to the directors there was no quick fix.

    How Does The Lost Vape Grus Perform?

    I’ve made as much use of the large diameter 510 plate on top of the Lost Vape Grus by using everything from the usual 24/25mm RDA’s to one of my favourite 28mm RTA’s, the Oumier Bulk RTA.

    Personally, I feel this device is better suited for larger atomizers, as much as it works absolutely fine with a 24 or 25mm tank or dripper, its really best suited for 28-30mm tanks and RDA’s.

    [/et_pb_text][et_pb_image _builder_version="4.25.0" _module_preset="default" theme_builder_area="post_content" alt="lost vape" src="http://headless.local/wp-content/uploads/2024/05/LostVape-Grus-tank-on-top.webp" hover_enabled="0" sticky_enabled="0"][/et_pb_image][et_pb_text _builder_version="4.25.0" _module_preset="default" theme_builder_area="post_content" hover_enabled="0" sticky_enabled="0"]

    But this is where it gets tricky because for the most part, its fairly normal to build lower with a larger diameter atomizer which in turn requires more power to perform.

    With the limited 100w output, the Grus seems to offer you a race car, with a moped engine, but for the most part, 100 watts is plenty. It’s just for some who may like to vape at over 100 watts every day, they just wont get the power they need.

    Even if a maximum of 100 watts is enough, a single 21700 battery wont last very long when used at 100 watts.

    [/et_pb_text][et_pb_image _builder_version="4.25.0" _module_preset="default" theme_builder_area="post_content" alt="lost vape" src="http://headless.local/wp-content/uploads/2024/05/LostVape-Grus-510-plate.webp" hover_enabled="0" sticky_enabled="0"][/et_pb_image][et_pb_text _builder_version="4.25.0" _module_preset="default" theme_builder_area="post_content" hover_enabled="0" sticky_enabled="0"]

    With regards to power output, the Lost Vape Grus hits as well as you would hope.

    You may not get 100 watts out of the Grus for long, but on a fully charged battery it does feel like it comfortably hits 100 watts.

    Can the Lost Vape Grus Be practical?

    For a single battery device, the Lost Vape Grus is fairly large, and fairly heavy but its still streamlined enough and certainly tough enough to be used day to day.

    I’d be more concerned about the 6.5ml Bubble glass on my 28mm tank than any concerns I might have about damaging the device.

    [/et_pb_text][et_pb_image _builder_version="4.25.0" _module_preset="default" theme_builder_area="post_content" alt="lost vape" src="http://headless.local/wp-content/uploads/2024/05/LostVape-Grus-510-plate.webp" hover_enabled="0" sticky_enabled="0"][/et_pb_image][et_pb_text _builder_version="4.25.0" _module_preset="default" theme_builder_area="post_content" hover_enabled="0" sticky_enabled="0"]

    The ability to house a 21700 battery certainly helps with battery life, if you tend to vape at around 50-60 watts each day, you’ll most likely find a 21700 battery will last you a day or there abouts. Its just about enough for me, with the occasional change of battery mid-evening.

    There is of course a USB Type-C Port for a decent 2amp charge so fast charging on the go is possible if you need.

    Can the Lost Vape Grus be used at work?

    Using the Grus at work isn’t like carrying a pod system around in your pocket that’s for sure! But its certainly easier to lug around and use than a larger dual 1865 device.

    [/et_pb_text][et_pb_image _builder_version="4.25.0" _module_preset="default" theme_builder_area="post_content" alt="lost vape" src="http://headless.local/wp-content/uploads/2024/05/LostVape-Grus-grus-text.webp" hover_enabled="0" sticky_enabled="0"][/et_pb_image][et_pb_text _builder_version="4.25.0" _module_preset="default" theme_builder_area="post_content" hover_enabled="0" sticky_enabled="0"]

    Again the concern boils down to battery life.

    Are you happy to carry spare batteries especially if you a: Vape a lot, b: Vape at a high wattage. If this is no problem then the Grus is a good option for day to day work life.

    Pros

    • Superb Finish
    • Feels well made
    • Clear Display
    • Easy navigation
    • Houses a 30mm atty no problem

    Its hard to fault this device. One of my favourite sayings ‘It is what it is’ comes to mind. Why do I say that? The fact this can take up to 30mm atomiser yet being limited to 100 watts because its a single 21700 device really restricts this device. Hence the mark down in the ‘Design’ category. Apart from that, the Lost Vape Grus is top-notch.

    [/et_pb_text][et_pb_code _builder_version=”4.25.0″ _module_preset=”default” theme_builder_area=”post_content” hover_enabled=”0″ sticky_enabled=”0″]Share On:[Sassy_Social_Share][/et_pb_code][/et_pb_column][/et_pb_row][/et_pb_section]
  • Lost Vape Thelema Pod Mod Review: Is It Worth Getting?

    Lost Vape Thelema Pod Mod Review: Is It Worth Getting?

    [et_pb_section fb_built="1" _builder_version="4.25.0" _module_preset="default" background_color="#000000" global_colors_info="{}"][et_pb_row _builder_version="4.25.0" _module_preset="default" global_colors_info="{}"][et_pb_column type="4_4" _builder_version="4.25.0" _module_preset="default" global_colors_info="{}"][et_pb_image src="http://headless.local/wp-content/uploads/2024/05/12345.webp" alt="lost vape" align="center" _builder_version="4.25.0" _module_preset="default" global_colors_info="{}"][/et_pb_image][et_pb_text _builder_version="4.25.0" _module_preset="default" global_colors_info="{}"]

    Lost Vape Thelema Pod Mod Review: Is It Worth Getting?

    /in News/by Administrator

    [/et_pb_text][et_pb_text _builder_version=”4.25.0″ _module_preset=”default” hover_enabled=”0″ global_colors_info=”{}” sticky_enabled=”0″]

    Daniel M. October 12, 2020

    PROS

    • Simple to operate
    • Exceptional build quality
    • Looks great
    • Great internal battery capacity
    • Nice range of coils spanning different vaping styles

    CONS

    • Difficult to see liquid level in the pod through the little window cutout

    Lost Vape are known for their use of Evolv’s DNA chip in box mods such as the Paranormal and Centaurus, as well as throwing them in their Orion and Orion Plus pod kits. This has meant Lost Vape’s products have usually been a little on the pricier side.

    Developing their own proprietary chip, the Quest, has meant Lost Vape have released a number of pod devices with more reasonable price tags. The Quest chip is also starting to make its way into some Lost Vape box mods, firstly with the B2B starter kit and now with the soon to be released Grus mod.

    The Thelema is a pod mod powered by their Quest chip, which features an internal 3000mAh battery and can fire up to 80W.

    Let’s take a look at the Thelema.

    Box Contents

    • 1 x Thelema Pod Mod
    • 1 x 0.2ohm Ultra Boost M4 Mesh Coil (pre-installed)
    • 1 x 0.3ohm Ultra Boost M1 Mesh Coil
    • 1 x 510 DL Drip Tip
    • 1 x 510 MTL Drip Tip
    • 1 x USB Type-C charging cable
    • 1 x User Manual
    • 1 x Warranty Card

    Specifications

    • Dimensions: 101 × 35.3 × 29.4mm
    • Weight: 152g
    • Power Output: 5-80W
    • Battery: Internal 3000mAh
    • Charging: USB Type-C 2A
    • Screen: 0.96″ TFT
    • Modes: Variable Wattage
    • Pod Capacity: 4ml (2ml TPD)

    Design & Build Quality

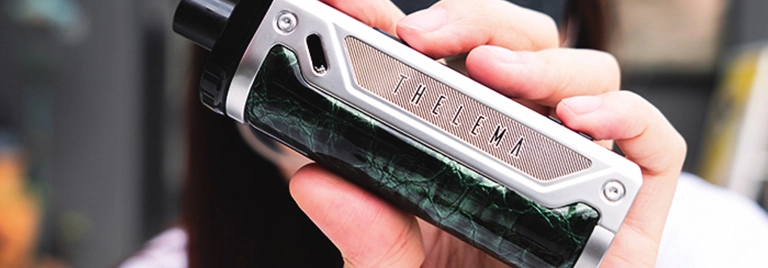
    The Lost Vape Thelema is constructed from zinc alloy and has a leather cushion which wraps around the curved back of the body.

    You can choose from three different colors; Stainless Steel, Black and Gunmetal. You can also choose which leather finish you want on the cushion; Ukiran Leather, Glossy Leather or Grain Leather. The leather comes in different colors depending on which metal finish you choose. Lost Vape do say the leather is real, too. It’s a nice touch to let you choose both the metal and leather finishes.

    The Thelema is very nice to hold in the hand and the leather cushion provides a very comfortable grip. It’s quite lightweight, too, but still feels like a solid and well built device.

    There are two engraved panels that run down each side of the Thelema, one has Lost Vape engraved and the other has Thelema. It looks sleek; sometimes branding can look tacky but this is done well.

    Above each panel are the airflow slots which are cut diagonally into the body of the device.

    On the bottom of the Thelema are the usual regulatory marks and some battery venting holes.

    The top of the Thelema has a recess where the pod fits into. In the recess are two gold plated contact pins and four magnets, which secure the pod in place. The magnets are not the strongest I’ve seen, but do a fine job of securing the pod in place.

    On the front of the Thelema, at the top, there is a little cut out which allows you to see the liquid level in the pod. I did find it quite difficult to see and just opted to lift the pod out to check my liquid level.

    In the center of the front panel is the 0.96” TFT display. Above the screen is the fire button, which is square shaped, but with the corners chopped off. Below the screen are your up and down adjustment buttons, which are rectangular in shape and again have the corners chopped off. Below the adjustment buttons is the USB Type C charging port.

    Overall, the build quality on the Thelema is exceptional. The body of the device is lovely to hold, the leather cushion is comfortable, it feels solid and well made, the screen is crisp and clear, the buttons are nice to press and are responsive in use. It looks good as well, sleek and stylish with curves and angles complementing each other very well.


    Features & Functions

    [/et_pb_text][et_pb_image src="http://headless.local/wp-content/uploads/2024/05/Lost-Vape-Thelema-Screen.webp" alt="lost vape" _builder_version="4.25.0" _module_preset="default" global_colors_info="{}"][/et_pb_image][et_pb_text _builder_version="4.25.0" _module_preset="default" global_colors_info="{}"]

    The Thelema is powered by Lost Vape’s Quest chip and is capable of firing between 5-80W.

    It only features a variable wattage mode, so is very simple to use; no complex menu systems or various power modes make it a device that is suited to both beginners and more experienced vapers who want a more streamlined vaping experience on the go.

    Selecting your desired wattage is done using the up and down adjustment buttons and then you use the fire button when you want to take a draw.

    The display is a 0.96” TFT screen in full color and the color scheme can be changed between any of the six available options; Blue, Yellow, White, Red, Green or Purple.

    There is a battery indicator in the top left of the display and the resistance of your coil in the top right. In the middle it displays your selected wattage as a nice big number, then you have the time in seconds of your last puff in the bottom left of the screen and a puff counter in the bottom right. There are also color indicators at the very bottom showing you which color scheme you have selected and the others available.

    The display itself is bright, vibrant and crisp, while keeping all of the information easily visible at a glance.

    The fire button and adjustment buttons are very nice to use; clicky and responsive, but not cheap feeling at all. These are actually the nicest buttons I’ve pressed on any vaping device.

    The Thelema has an internal 3000mAh battery, which is a great capacity to see on a pod device. You should be able to get a full day’s use out of the battery, but if you do need to charge during the day this is done using the USB Type-C port.

    The Thelema supports 2A charging and Lost Vape say it will be fully charged in approximately 60 minutes. My math says it will take about 90 minutes to charge at 2A and in reality I measured it to be approximately 100 minutes.

    Thelema Button Combinations

    • Turn On / Off: Five clicks of ‘fire’ button
    • Lock Adjustment Buttons: Press ‘up’ and ‘down’ adjustment buttons together.
    • Change colour theme: Press ‘fire’ and ‘up’ buttons together
    • Reset Puff Counter: Press ‘fire’ and ‘down’ buttons together

    Pod

    [/et_pb_text][et_pb_image src="http://headless.local/wp-content/uploads/2024/05/Lost-Vape-Thelema-Pod.webp" alt="lost vape" _builder_version="4.25.0" _module_preset="default" global_colors_info="{}"][/et_pb_image][et_pb_text _builder_version="4.25.0" _module_preset="default" global_colors_info="{}"]

    The pod is constructed from PCTG and is very darkly tinted on the top. The lower portion of the pod is more lightly tinted, allowing you to see your liquid level more clearly.

    You have an option of two 510 drip tips in the box, one thinner and one thicker. Both of the drip tips fit nicely into the top of the pod and are secured by two o-rings. The thinner drip tip has a glossy finish, while the thicker one has a matte finish. While the thicker drip tip has a wider bore and is more suited to direct lung vaping, you can still use the thinner one for direct lung vaping too, so it’s a matter of which you prefer to use.

    The fill port is big enough for standard sized nozzles and is covered with a rubber bung, which is quite chunky. The sample version that I received has the word ‘Oiling’ on the rubber bung. Lost Vape has advised that this was a mistranslation and it has been changed to ‘Open’ on the final production models.

    [/et_pb_text][et_pb_image src="http://headless.local/wp-content/uploads/2024/05/Lost-Vape-Thelema-Fill-Port.webp" alt="lost vape" _builder_version="4.25.0" _module_preset="default" global_colors_info="{}"][/et_pb_image][et_pb_text _builder_version="4.25.0" _module_preset="default" global_colors_info="{}"]

    The bottom of the pod is where your coils are installed and they are press fit, so it’s quick and easy to remove and replace your coil when needed. You can change the coil while you have liquid in the pod too, so no need to finish the liquid with a spent coil or dump the juice.

    There is an airflow control ring which is attached to the bottom of the installed coil. This is reusable, so you swap it onto your new coil when changing a coil. Don’t throw it away with the old coil. The airflow control ring lets you dial in your preferred airflow via two cyclops airflow slots and there is also a single hole if you want to restrict the airflow down to a mouth to lung draw.

    Coils

    The Thelema comes with two coils included in the box:

    • 0.2ohm Ultra Boost M4 Mesh Coil (preinstalled)
    • 0.3ohm Ultra Boost M1 Mesh Coil

    You can also use any of the other coils in the Ultra Boost coil range; the 0.15ohm, 0.6ohm and the 1.0ohm, as well as the Ultra Boost RBA deck.

    The 0.2ohm coil is rated for use between 40-60W and the 0.3ohm coil is rated for use between 30-40W.


    Performance

    [/et_pb_text][et_pb_image src="http://headless.local/wp-content/uploads/2024/05/Lost-Vape-Thelema-2.webp" alt="lost vape" _builder_version="4.25.0" _module_preset="default" global_colors_info="{}"][/et_pb_image][et_pb_text _builder_version="4.25.0" _module_preset="default" global_colors_info="{}"]

    I first tried the 0.2ohm coil as it was pre-installed in the pod. The airflow was really smooth, I kept it fully open and the cloud production was good. Flavor on the 0.2ohm coil is good at any wattage in the recommended range, so it’s really just a case of finding the right wattage in the recommended range to suit how warm you like your vape.

    The 0.3ohm coil has a similar airflow feel to the 0.2ohm coil, retaining the same smoothness. It does produce less vapor than the 0.2ohm coil, which is to be expected due to the lower recommended wattage range. Flavor is noticeably less than the 0.2ohm coil, also. It’s certainly not lacking in flavor, but just lacks the pop that I got from the 0.2ohm. I wish I’d used the 0.3ohm coil first, as coming from the 0.2ohm coil just took the shine away.


    Verdict

    Overall, the Lost Vape Thelema is a very nice pod mod. The internal battery has a great capacity, there is a nice selection of coils available ranging from DL to MTL, along with an RBA coil option if you prefer.

    The mod itself looks great, feels great, has exception build quality and to top it off it’s really simple to use.

    The only negative points I can think of is that it’s a little difficult to see your liquid level in the pod through the little cut out window.

    The overall size of the Thelema is slightly larger than some other pod mod devices, which is a small trade off for having the large capacity internal battery. It still fits in the hand lovely and maintains a nice, holdable weight.

    [/et_pb_text][et_pb_code _builder_version=”4.25.0″ _module_preset=”default” global_colors_info=”{}”]Share On:[Sassy_Social_Share][/et_pb_code][/et_pb_column][/et_pb_row][/et_pb_section]

  • Lost Vape Gemini Hybrid Pod Mod Kit 80W Review

    Lost Vape Gemini Hybrid Pod Mod Kit 80W Review

    [et_pb_section fb_built="1" theme_builder_area="post_content" _builder_version="4.25.0" _module_preset="default" background_color="#000000" hover_enabled="0" sticky_enabled="0"][et_pb_row _builder_version="4.25.0" _module_preset="default" theme_builder_area="post_content"][et_pb_column _builder_version="4.25.0" _module_preset="default" type="4_4" theme_builder_area="post_content"][et_pb_image _builder_version="4.25.0" _module_preset="default" theme_builder_area="post_content" alt="lost vape" src="http://headless.local/wp-content/uploads/2024/05/mp80.webp" align="center" hover_enabled="0" sticky_enabled="0"][/et_pb_image][et_pb_text _builder_version="4.25.0" _module_preset="default" theme_builder_area="post_content" hover_enabled="0" sticky_enabled="0"]

    Lost Vape Gemini Hybrid Pod Mod Kit 80W Review

    /in News/by Administrator

    [/et_pb_text][et_pb_text _builder_version=”4.25.0″ _module_preset=”default” theme_builder_area=”post_content” hover_enabled=”0″ sticky_enabled=”0″]

    Discussion in ‘Standard E-Cigarette Reviews’ started by Frenkyou, Aug 15, 2020.

    The prestigious Lost vape company after a transitory period returns to the Mods. With the release of the Centaurus DNA250C the new course has officially begun, several interesting innovations are expected soon.

    What we will talk about today is a true 2 in 1 Kit, a complete and quality product that allows it to be used with all the functions of a Mod and with all the advantages of a pod, without imperfections deriving from one or the other. solution.

    Gemini Hybrid Pod Mod has several interesting features let’s see them together.

    Enjoy the reading

    The packaging on the front shows the logo, the brand name, the image of the Mod in Pod format, some main features in the form of an icon and the wording indicating the name of the device.

    On the back are listed: content, warnings, social icons where the brand is present, security code in relief, bar code, color indication (Black marine) logos & brands

    [/et_pb_text][et_pb_image _builder_version="4.25.0" _module_preset="default" theme_builder_area="post_content" alt="lost vape" src="http://headless.local/wp-content/uploads/2024/05/2.webp" hover_enabled="0" sticky_enabled="0"][/et_pb_image][et_pb_text _builder_version="4.25.0" _module_preset="default" theme_builder_area="post_content" hover_enabled="0" sticky_enabled="0"]

    Kit contents:
    – 1 Gemini Hybrid Kit
    – 1 Pod (4ML Pre-installed)
    – 1 510 adapter
    – 1 Drip Tip 510 MTL
    – 1 Micro Usb cable
    – 1 Mesh Coil Ultra Boost M4 0.2Ω range 40-60W (Pre-installed)
    – 1 Coil Ultra Boost MTL 1.0Ω range 8-15W
    – 1 Air adjustment ring for Ultra Boost coils
    – 1 Sachet of O-rings
    – 1 Warranty Card
    – 1 User manual

    [/et_pb_text][et_pb_image _builder_version="4.25.0" _module_preset="default" theme_builder_area="post_content" alt="lost vape" src="http://headless.local/wp-content/uploads/2024/05/3.webp" hover_enabled="0" sticky_enabled="0"][/et_pb_image][et_pb_text _builder_version="4.25.0" _module_preset="default" theme_builder_area="post_content" hover_enabled="0" sticky_enabled="0"]

    Technical parameters:
    Dimensions: 81.4x48x23mm
    Weight with battery and tank full of liquid: 216g
    Mod Material: Zinc Alloy
    Battery: 18650 (not included)
    Pod capacity: 4ml
    Output: 5-80W increment / decrement 0.5W at a time
    Screen: 0.96 inch color TFT display
    Current range: 0.3A-22A.
    Resistance range: 0.12-5.0Ω

    Compatible Coils:
    0.3Ω Ultra Boost M1 Mesh Coil (30-40W, for DL)
    0.6Ω Ultra Boost M2 Mesh Coil (20-28W, for DL)
    0.15Ω M3 Ultra Boost Mesh Coil (40-70W, for DL)
    0.20Ω M4 Ultra Boost Mesh Coil (40-60W, for DL)
    1.0Ω MTL Ultra Boost Coil (8-15W, for MTL)
    Ultra Boost RBA Deck Range (0.15-3.0Ω)

    Available colors:
    Black carbon Fiber, Gun Metal Carbon Fiber, SS Carbon Fiber, Black Marine, Gunmetal Puzzling, SS Jungle, Black fire & Ice, Gunmetal Crater, SS Glacier.

    [/et_pb_text][et_pb_image _builder_version="4.25.0" _module_preset="default" theme_builder_area="post_content" alt="lost vape" src="http://headless.local/wp-content/uploads/2024/05/4.webp" hover_enabled="0" sticky_enabled="0"][/et_pb_image][et_pb_text _builder_version="4.25.0" _module_preset="default" theme_builder_area="post_content" hover_enabled="0" sticky_enabled="0"]

    The body of this Hybrid is entirely built in solid zinc alloy, this feature raises its weight, however the extremely small dimensions and the perfect fitting of the parts favor its portability.

    On the front side, the Fire key is placed at the top in its classic ideal position, its surface is mirror polished, the Fire key is made of metal, its shape is round, slightly protruding.

    The screen has a 0.96-inch color TFT display that contains all the information useful for vaping, we find: the graphic level with residual battery charge percentage, coil Ω, Watts set, last Puff duration, puff counter, lock / unlock icon in the shape of a padlock, indication on the six available and selectable background colors.

    The two up / down adjustment keys are basically a scaled-down execution of the Fire key.

    The Micro-Usb socket is the last detail of the front and is located in the lower part.

    The back side is bare, with a clean line without frills, it blends well with the lower and upper shelves.

    [/et_pb_text][et_pb_image _builder_version="4.25.0" _module_preset="default" theme_builder_area="post_content" alt="lost vape" src="http://headless.local/wp-content/uploads/2024/05/5.webp" hover_enabled="0" sticky_enabled="0"][/et_pb_image][et_pb_text _builder_version="4.25.0" _module_preset="default" theme_builder_area="post_content" hover_enabled="0" sticky_enabled="0"]

    Both panels are colored “Black marine”, off-centered at the top on both sides we find a black plastic insert well inserted in the line of the Mod. This detail has the dual task of making visible the level of residual liquid and to air to the coil through three slots.

    The silver band present on both panels, takes on different shades of color depending on the exposure to light, on one panel the writing “Gemini Hybrid” on the other shows the writing “Lost Vape”.

    [/et_pb_text][et_pb_image _builder_version="4.25.0" _module_preset="default" theme_builder_area="post_content" alt="lost vape" src="http://headless.local/wp-content/uploads/2024/05/6.webp" hover_enabled="0" sticky_enabled="0"][/et_pb_image][et_pb_text _builder_version="4.25.0" _module_preset="default" theme_builder_area="post_content" hover_enabled="0" sticky_enabled="0"]

    The top shelf is an integral part of the structure, aesthetically very beautiful compared to the classic pods with often unstable attacks, the Drip-Tip 510 is replaceable.

    On the bottom of the mod we find the notch to open the battery door, this notch also acts as a vent of the 18650 cell.
    Always on the bottom they are present; the C E mark, the disposal logo and the words “Designed and manufactured by Lost Vape LTD”.

    The pod compartment has the contact poles marked, gold / plated, with the bottom one floating. To facilitate the extraction of the cell there is a practical and useful strap marked Lost Vape.

    Four magnets positioned on the four corners of the battery compartment hold the door effectively and without any movement.
    In the same picture you can see the Pod installed, the air adjustment ring is completely wide open.

    [/et_pb_text][et_pb_image _builder_version="4.25.0" _module_preset="default" theme_builder_area="post_content" alt="lost vape" src="http://headless.local/wp-content/uploads/2024/05/7.webp" hover_enabled="0" sticky_enabled="0"][/et_pb_image][et_pb_text _builder_version="4.25.0" _module_preset="default" theme_builder_area="post_content" hover_enabled="0" sticky_enabled="0"]

    In this image the Gemini Hybrid Kit with the 18650 cell inserted, the internal part of the door being metal does not have magnets.

    Included in the kit there are two rubber caps to further choke the two external air-flows, however the air control ring performs its task very well by itself, making them superfluous.

    [/et_pb_text][et_pb_image _builder_version="4.25.0" _module_preset="default" theme_builder_area="post_content" alt="lost vape" src="http://headless.local/wp-content/uploads/2024/05/8-scaled.webp" hover_enabled="0" sticky_enabled="0"][/et_pb_image][et_pb_text _builder_version="4.25.0" _module_preset="default" theme_builder_area="post_content" hover_enabled="0" sticky_enabled="0"]

    To remove the Pod from the Hibryd you must first remove the lid from the battery compartment, then you must remove the Drip-Tip, finally you must press on the recess created specifically on the top of the cartridge and pull, to insert it you carry out the reverse procedure, this operation is easier to do than describe it and it’s really simple.

    [/et_pb_text][et_pb_image _builder_version="4.25.0" _module_preset="default" theme_builder_area="post_content" alt="lost vape" src="http://headless.local/wp-content/uploads/2024/05/9.webp" hover_enabled="0" sticky_enabled="0"][/et_pb_image][et_pb_text _builder_version="4.25.0" _module_preset="default" theme_builder_area="post_content" hover_enabled="0" sticky_enabled="0"]

    The Hibryd has two 510 Drip-Tips, one very thin, elongated, reminiscent of a cigarette mouthpiece and is suitable for MTL vaping with the 1.0Ω Ultra Boost MTL coil, the other Drip-tip is designed for the Flavor, in my opinion the latter has an excellent performance at 40 / 45W.

    The Pod with a liquid capacity of 4ml has the refil cap placed at the top, once the lid has been removed it is possible to comfortably carry out the filling operation without removing it from its seat.

    The liquid control side windows offer good visual control thanks to the very clear material of the pod

    We then choose the new coil and after wetting it with the liquid, we can screw it firmly to the AFC control ring, then inserting it into the cartridge.

    I recommend waiting at least five minutes before starting to vape to allow the cotton in the coil to absorb the liquid well.

    [/et_pb_text][et_pb_image _builder_version="4.25.0" _module_preset="default" theme_builder_area="post_content" alt="lost vape" src="http://headless.local/wp-content/uploads/2024/05/11.webp" hover_enabled="0" sticky_enabled="0"][/et_pb_image][et_pb_text _builder_version="4.25.0" _module_preset="default" theme_builder_area="post_content" hover_enabled="0" sticky_enabled="0"]

    – Coil Ultra Boost MTL 1.0Ω range 8-15W:
    With this resistance I used a liquid 50/50 at 4mg / ml of my production with Tob-Ermes aroma.
    The coil (not mesh) activates surprisingly well already starting from 5W, just the time to do the break-in of the coil and I switched to 8W, the two air-flow holes on the body of this coil are so small that they hardly need to be partialized to obtain a good contrasted MTL puff.

    Vaping slowly the puff is very fluid while vaping with more energy you feel the need to increase watts as the prehit curve of the mod falls.
    So the steam is warm and low in quantity, the aromatic yield has yet to be defined, after a short transition to 10W with consequent general improvement I tried all possible wattages within 15W (physical limit of the coil).

    I found 13.5W an excellent compromise without necessarily having to push myself beyond this threshold.
    I adjusted the ring in order to have a contrasted puff, the vapor is hot enough and the aromatic yield really valid to be an MTL coil and I am not a lover of this type of vape, the vapor I perceive it dry and with a remarkable Hit, thanks to the shape of the Drip-tip this type of vape reminds me a lot of burnt cigarettes.

    With this configuration, the consumption of liquid is really negligible, the 4ml of autonomy of the tank really give a lot of time to the vape before having to refill.

    In this Pod-AIO-MTL configuration, Hibryd has done very well, the 4mg / ml present in my liquid fully satisfy, other atomizers with pre-set heads with this concentration (4mg / ml) have a lower yield than to what the “Ultra Boost MTL” from lost Vape, this is great news for those who want to stay away from cigarettes and receive contentment with low nicotine concentrations.

    – Mesh Coil Ultra Boost M4 from 0.2Ω range 40-60W:
    With this resistance I used the wide Drip-Tip 510 supplied in the kit, the liquid chosen was the Tropical from Tob, 70/30 at 0mg / ml.

    As happens with other latest generation meshes, even with this Ultra Boost M4 it is surprising to observe the ability to be able to work perfectly at much lower speeds than the minimum indicated on the resistance.

    At 40W with wide open air-flow I distinctly perceive the intense and unmistakable tropical aroma of my liquid, its sweetness conquers me, the vapor density is remarkable, no splash on the tongue, the puff is really smooth and soft, even the noise of suction is muffled and not at all annoying, I must say that before varying the wattage and doing air regulation tests I spent a lot of time with this configuration.

    I reached 60W without the coil showing signs of sagging, or the drip-tip getting too hot, with this configuration the consumption of liquid becomes important, you have to top up the tank often, after having made several adjustments and tests I found at 45W with the air ring completely open my ideal setting, sometimes to vary I go down to 35W (under the minimum speed of the M4 coil) and close the air-flow to 50%. These in the use of Hibryd are the settings that suit me and satisfy me.
    The Gemini Hibryd lives up to its name and proves capable of passing well the exam of the two MTL / DTL tests.

    Note: The new 0.2 & 1.0Ω Ultra Boost Coils have been renewed to be able to use the AFC control ring.
    However, all Ultra Boost coils are compatible with the Gemini Hybrid.

    [/et_pb_text][et_pb_image _builder_version="4.25.0" _module_preset="default" theme_builder_area="post_content" alt="lost vape" src="http://headless.local/wp-content/uploads/2024/05/12.webp" hover_enabled="0" sticky_enabled="0"][/et_pb_image][et_pb_text _builder_version="4.25.0" _module_preset="default" theme_builder_area="post_content" hover_enabled="0" sticky_enabled="0"]

    The Ultra Boost RBA package contains:
    – 1 Deck Rba
    – 1 spare O’ring pouch
    – 1 Allen key to tighten the coils
    – 2 Spare grains to tighten the coils
    – 2 pre-rolled coils
    – Cotton wick
    – 1 510 adapter

    Note: The Ultra Boost RBA coil is available for purchase separately.

    [/et_pb_text][et_pb_image _builder_version="4.25.0" _module_preset="default" theme_builder_area="post_content" alt="lost vape" src="http://headless.local/wp-content/uploads/2024/05/13.webp" hover_enabled="0" sticky_enabled="0"][/et_pb_image][et_pb_text _builder_version="4.25.0" _module_preset="default" theme_builder_area="post_content" hover_enabled="0" sticky_enabled="0"]

    – Ultra Boost RBA:
    It is made for a Flavor / Lung use and despite its small size it is not difficult to regenerate.
    The perforated turrets are easy to insert with the coil legs, the supplied Allen key fits easily on the head of the turrets to screw / unscrew the special and tiny grains, even the back combing is relatively simple, the cotton whiskers must be folded into the special notches made on the deck, once the bell / chimney has been inserted, the excess cotton can be trimmed with the help of scissors.

    Note the two large slots at the base of the RBA, the lack of a special AFC makes this RBA usable only in Flavor / DTL.

    I find this RBA useful for those who want to have fun building flavor builds, experimenting their skills, but after a couple of not-so-optimal attempts and given the high performance and ease of use of the pre-made coils, I prefer the Mesh Coil Ultra Boost M4, I know, I’m lazy!

    [/et_pb_text][et_pb_image _builder_version="4.25.0" _module_preset="default" theme_builder_area="post_content" alt="lost vape" src="http://headless.local/wp-content/uploads/2024/05/14.webp" hover_enabled="0" sticky_enabled="0"][/et_pb_image][et_pb_text _builder_version="4.25.0" _module_preset="default" theme_builder_area="post_content" hover_enabled="0" sticky_enabled="0"]

    The 510 adapter accessory that allows the Gemini Hybrid to become a real 18650 Box Mod is simple and well made, the form factor faithfully follows that of the Tank / Pod, in fact it occupies the same housing and the insertion / disarming procedure is analogous.

    [/et_pb_text][et_pb_image _builder_version="4.25.0" _module_preset="default" theme_builder_area="post_content" alt="lost vape" src="http://headless.local/wp-content/uploads/2024/05/15.webp" hover_enabled="0" sticky_enabled="0"][/et_pb_image][et_pb_text _builder_version="4.25.0" _module_preset="default" theme_builder_area="post_content" hover_enabled="0" sticky_enabled="0"]

    Qualitatively, this 510 adapter has nothing to do with certain improvised accessories to transform the various classic pods into Mods.

    [/et_pb_text][et_pb_image _builder_version="4.25.0" _module_preset="default" theme_builder_area="post_content" alt="lost vape" src="http://headless.local/wp-content/uploads/2024/05/16.webp" hover_enabled="0" sticky_enabled="0"][/et_pb_image][et_pb_text _builder_version="4.25.0" _module_preset="default" theme_builder_area="post_content" hover_enabled="0" sticky_enabled="0"]

    Aesthetically it goes unnoticed being hidden by the battery compartment panel and to the eye the Gemini looks like a real Box Mod born like this.

    The Gemini Hybrid in the Box Mod version houses atomizers up to 24mm without overflowing. The particular conformation of the upper surface beveled on the sides makes it particularly beautiful even with smaller diameter atomizers.

    [/et_pb_text][et_pb_image _builder_version="4.25.0" _module_preset="default" theme_builder_area="post_content" alt="lost vape" src="http://headless.local/wp-content/uploads/2024/05/17.webp" hover_enabled="0" sticky_enabled="0"][/et_pb_image][et_pb_text _builder_version="4.25.0" _module_preset="default" theme_builder_area="post_content" hover_enabled="0" sticky_enabled="0"]

    The circuit of the Gemini Hybrid 80W:
    – To turn on / off the device, five clicks on the fire button are required in less than two seconds.
    – Sleep mode is automatically activated after 10s of inactivity.
    – The wattage with the mod unlocked is activated with the Up / Down keys with an increase and decrease of 0.5W at a time from 5 to 80W.
    – To lock / unlock the wattages, press the Up / Down buttons simultaneously.
    – To delete the puff number, press the Down / Fire buttons simultaneously.
    – To change one of the six screen colors, press the Up / Fire buttons simultaneously.
    – No Pass-Through the device warns on the screen that it is not allowed to vape while charging for safety reason.
    – Low battery the device warns on the screen that the battery charge level is low.
    – Check atomizer the device warns on the screen that it does not detect the atomizer.
    – Short circuit the device warns on the screen that the resistive value is less than 0.1Ω.
    – Too hot, when the device reaches a board temperature above 80 °, it blocks and restores below 60 °.
    – Over 10s, the device locks for safety when 10s of continuous delivery are reached.

    [/et_pb_text][et_pb_image _builder_version="4.25.0" _module_preset="default" theme_builder_area="post_content" alt="lost vape" src="http://headless.local/wp-content/uploads/2024/05/18.webp" hover_enabled="0" sticky_enabled="0"][/et_pb_image][et_pb_image _builder_version="4.25.0" _module_preset="default" theme_builder_area="post_content" alt="lost vape" src="http://headless.local/wp-content/uploads/2024/05/19.webp" hover_enabled="0" sticky_enabled="0"][/et_pb_image][et_pb_text _builder_version="4.25.0" _module_preset="default" theme_builder_area="post_content" hover_enabled="0" sticky_enabled="0"]

    Gemini Hybrid Kit 80W HighLights:

    Pro:
    2-in-1 hybrid device (pod mode and mod mode).
    Aesthetically beautiful in both AIO & MOD configurations.
    Compact size.
    Construction materials.
    Good finishes.
    Simple design.
    Precise battery cover.
    Easy to navigate chipset.
    Instant power delivery.
    Good battery management.
    18650 power supply.
    0.96 inch color TFT screen with 6 colors.
    Replaceable 510 DL / MTL Drip Tip.
    4ml pod with convenient refill.
    Double liquid control windows.
    Adjustable air flow for the new 0.2 and 1.0Ω Ultra Boost Coils.
    Compatible with all Ultra Boost Coil and RBA ranges.
    Almost non-existent condensation even after intense use.

    Tips:
    Volts not indicated on the screen.

    Thanks to Lost Vape for making this kit available to me for the review: PRESALE-GEMINI HYBRID 80W POD MOD

    [/et_pb_text][et_pb_image _builder_version="4.25.0" _module_preset="default" theme_builder_area="post_content" alt="lost vape" src="http://headless.local/wp-content/uploads/2024/05/20.webp" hover_enabled="0" sticky_enabled="0"][/et_pb_image][et_pb_code _builder_version="4.25.0" _module_preset="default" theme_builder_area="post_content" hover_enabled="0" sticky_enabled="0"]Share On:[Sassy_Social_Share][/et_pb_code][/et_pb_column][/et_pb_row][/et_pb_section]

  • Lost Vape BTB 100W Starter Kit Review

    Lost Vape BTB 100W Starter Kit Review

    [et_pb_section fb_built="1" theme_builder_area="post_content" _builder_version="4.25.0" _module_preset="default" background_color="#000000" hover_enabled="0" sticky_enabled="0"][et_pb_row _builder_version="4.25.0" _module_preset="default" theme_builder_area="post_content"][et_pb_column _builder_version="4.25.0" _module_preset="default" type="4_4" theme_builder_area="post_content"][et_pb_image src="http://headless.local/wp-content/uploads/2024/05/mt80.webp" _builder_version="4.25.0" _module_preset="default" theme_builder_area="post_content" alt="lost vape" align="center" hover_enabled="0" sticky_enabled="0"][/et_pb_image][et_pb_text _builder_version="4.25.0" _module_preset="default" theme_builder_area="post_content" hover_enabled="0" sticky_enabled="0"]

    Lost Vape BTB 100W Starter Kit Review

    /in News/by Administrator

    [/et_pb_text][et_pb_text _builder_version=”4.25.0″ _module_preset=”default” theme_builder_area=”post_content” hover_enabled=”0″ sticky_enabled=”0″]

    Discussion in ‘Standard E-Cigarette Reviews’ started by Frenkyou, Aug 17, 2020.

    Recently Lost Vape decided to go back to “Back To Basic” (BTB) origins.
    It all started with the powerful and prestigious Centaurus DNA250C dual battery Mod.

    Lost Vape is a much admired brand with many fan’s all over the world, these people require innovation, so the research and development department of Lost Vape went to work to please its fan’s.

    I was able to appreciate the extraordinary transforming qualities and the constructive care of the brand new Gemini Hibyd 80W.
    Today I would like to introduce you the BTB (Back To Basic) Kit 100W equipped with 18650 battery and temperature control functions.

    Enjoy the reading.

    The package features the Lost Vape brand logo and the wording “Quest” on the front.
    On the white background there is the image of the kit with a tricolor motif regarding its graphics (SS Vintage Classic).
    On this side there are some main features in the form of icons, while the name of the product is shown in full at the bottom right (BACK TO BASIC KIT 100W).

    On the back are indicated; the contents of the kit, the warnings, the security code, the social networks where Lost Vape is present with its fan’s, the barcode, the logos and the legal trademarks.

    [/et_pb_text][et_pb_image _builder_version="4.25.0" _module_preset="default" theme_builder_area="post_content" alt="lost vape" src="http://headless.local/wp-content/uploads/2024/05/1.webp" hover_enabled="0" sticky_enabled="0"][/et_pb_image][et_pb_text _builder_version="4.25.0" _module_preset="default" theme_builder_area="post_content" hover_enabled="0" sticky_enabled="0"]

    “The New Demarcation” and the name of the product are printed on the side of the packaging.

    [/et_pb_text][et_pb_image _builder_version="4.25.0" _module_preset="default" theme_builder_area="post_content" alt="lost vape" src="http://headless.local/wp-content/uploads/2024/05/2-1.webp" hover_enabled="0" sticky_enabled="0"][/et_pb_image][et_pb_text _builder_version="4.25.0" _module_preset="default" theme_builder_area="post_content" hover_enabled="0" sticky_enabled="0"]

    Contents of the BTB 100W Kit:
    -1 BTB Kit with UBX tank (2ML)
    -1 Bubble Glass UBX (4ML)
    -1 Coil Ultra Boost M3 of 0.15Ω Pre-installed
    -1 1.0Ω MTL Ultra Boost Coil
    -1 Drip Tip MTL
    -1 USB-C charging cable
    -1 Pack of spare O-rings
    -1 User manual
    -1 Warranty card

    [/et_pb_text][et_pb_image _builder_version="4.25.0" _module_preset="default" theme_builder_area="post_content" alt="lost vape" src="http://headless.local/wp-content/uploads/2024/05/3-1.webp" hover_enabled="0" sticky_enabled="0"][/et_pb_image][et_pb_text _builder_version="4.25.0" _module_preset="default" theme_builder_area="post_content" hover_enabled="0" sticky_enabled="0"]

    Parameter:
    – Body material: zinc alloy
    – Dimensions: 91x36x25 mm
    – Weight: 202g (246g including battery)
    – Battery: single 18650 (Not included)
    – 0.96 inch color TFT screen
    – Output power: 5-100W
    – Supported working modes: VW / VV / TC-SS / TC-Ni / TC-Ti
    – Output voltage: 0.8V-7V
    – Current range: 0.3A-30A
    – Temperature range: 200 ° F-600 ° F / 100 ° C-300 ° C
    – Range of resistances supported: 0.1-3.0Ω
    – Type C fast charging
    – Compatible with the whole series of Coil Ultra Boost

    [/et_pb_text][et_pb_image _builder_version="4.25.0" _module_preset="default" theme_builder_area="post_content" alt="lost vape" src="http://headless.local/wp-content/uploads/2024/05/4-1.webp" hover_enabled="0" sticky_enabled="0"][/et_pb_image][et_pb_image _builder_version="4.25.0" _module_preset="default" theme_builder_area="post_content" alt="lost vape" src="http://headless.local/wp-content/uploads/2024/05/5-1.webp" hover_enabled="0" sticky_enabled="0"][/et_pb_image][et_pb_text _builder_version="4.25.0" _module_preset="default" theme_builder_area="post_content" hover_enabled="0" sticky_enabled="0"]

    Available colours:
    Red Camo, Blue Camo, Green Camo, Black Camo, SS Vintage Classic, Black Vintage Camo, Matt Black Vintage Stars.

    [/et_pb_text][et_pb_image _builder_version="4.25.0" _module_preset="default" theme_builder_area="post_content" alt="lost vape" src="http://headless.local/wp-content/uploads/2024/05/6-1.webp" hover_enabled="0" sticky_enabled="0"][/et_pb_image][et_pb_text _builder_version="4.25.0" _module_preset="default" theme_builder_area="post_content" hover_enabled="0" sticky_enabled="0"]

    Description BTB Mod 100W:
    Like its sister Gemini-Hybrid, the BTB-100W is built in solid zinc alloy, the elegant design and its very small shape make it comfortable and easy to hold.

    The entire frame, excluding the removable panel, is therefore a single block in zinc alloy, at the top the section tapers progressively, connecting with the base of the 510 cup.
    The base of the 510 cup has been machined to integrate in a visually pleasing way into the overall design of the BTB.

    The massive side panels of my SS Vintage Classic version are covered with a layer of very durable fabric (looks like jeans).
    The decorations on the fabric include a tricolor transversal strip on both sides, on one side we find the initials BTB (Back To Basic) on the other side the word Lost Vape appears.

    The non-decorated fabric part and the decorated fabric areas have two different and pleasant textures to the touch.
    The panel with the wording BTB is the removable one, perfectly coupled with the structure that houses it, to be removed it uses a recess on the bottom.

    [/et_pb_text][et_pb_image _builder_version="4.25.0" _module_preset="default" theme_builder_area="post_content" alt="lost vape" src="http://headless.local/wp-content/uploads/2024/05/7-1.webp" hover_enabled="0" sticky_enabled="0"][/et_pb_image][et_pb_image _builder_version="4.25.0" _module_preset="default" theme_builder_area="post_content" alt="lost vape" src="http://headless.local/wp-content/uploads/2024/05/8-1.webp" hover_enabled="0" sticky_enabled="0"][/et_pb_image][et_pb_text _builder_version="4.25.0" _module_preset="default" theme_builder_area="post_content" hover_enabled="0" sticky_enabled="0"]

    The front of the BTB houses at the top the slightly protruding fire button, circular in shape and large.
    The fire button is made of black plastic.
    The 0.96 inch color TFT screen is the same color as the control keys (black).
    The Up / Down control keys are placed on an elongated rocker, below them is the only mode key having the same shape and color.
    The USB Type-C charging socket is located in the lower part of this side.

    [/et_pb_text][et_pb_image _builder_version="4.25.0" _module_preset="default" theme_builder_area="post_content" alt="lost vape" src="http://headless.local/wp-content/uploads/2024/05/9-1.webp" hover_enabled="0" sticky_enabled="0"][/et_pb_image][et_pb_text _builder_version="4.25.0" _module_preset="default" theme_builder_area="post_content" hover_enabled="0" sticky_enabled="0"]

    The 510 cup is screwed to the body via three French screws, it is cleverly raised to avoid scratching the edge of the mod during the positioning phases of the atomizers. The floating pin 510 is gold plated and the connection thread has a good smoothness.

    The BTB can comfortably accommodate ø 25mm atomizers, the original UBX tank is ø 24mm.

    The C E mark, the disposal logo and the words “Designed and manufactured by lost Vape are shown on the bottom of the BTB Mod.
    Also on the bottom there are two large slits for the 18650 cell vent.

    [/et_pb_text][et_pb_image _builder_version="4.25.0" _module_preset="default" theme_builder_area="post_content" alt="lost vape" src="http://headless.local/wp-content/uploads/2024/05/11-1.webp" hover_enabled="0" sticky_enabled="0"][/et_pb_image][et_pb_text _builder_version="4.25.0" _module_preset="default" theme_builder_area="post_content" hover_enabled="0" sticky_enabled="0"]

    The compartment / battery is arranged in an orderly manner and is fixed to the mod by four screws elegantly hidden by as many rubber caps (top finishes!), Has three magnets, two of circular shape positioned at the top and one of rectangular shape positioned in bass.

    The slot for the 18650 cell has the polarities marked, the negative pole is spring loaded, to facilitate the extraction of the battery there is a useful strap signed Lost Vape.

    The removable panel has an adhesive label on the inside with warnings for the batteries.

    The quality and super finishes of Lost Vape are also noticeable in the perfect closure of the Panel with the Mod. This is by far the most precise and perfect coupling that I have ever seen on Box Mod of this type. Once fixed, the panel will look like a single structure with the Mod!

    [/et_pb_text][et_pb_image _builder_version="4.25.0" _module_preset="default" theme_builder_area="post_content" alt="lost vape" src="http://headless.local/wp-content/uploads/2024/05/12-1.webp" hover_enabled="0" sticky_enabled="0"][/et_pb_image][et_pb_text _builder_version="4.25.0" _module_preset="default" theme_builder_area="post_content" hover_enabled="0" sticky_enabled="0"]

    Description UBX Tank 24mm – Innovative Airflow Intake-MTL Mode & DL Mode:

    The UBX Tank uses the same pre-made Ultra Boost coils as the Gemini Hybrid. It is completely detachable, including the AFC ring and this is good for being able to carry out periodic deep cleaning.

    The colors of choice for the UBX Tank are seven.

    [/et_pb_text][et_pb_image _builder_version="4.25.0" _module_preset="default" theme_builder_area="post_content" alt="lost vape" src="http://headless.local/wp-content/uploads/2024/05/13-1.webp" hover_enabled="0" sticky_enabled="0"][/et_pb_image][et_pb_text _builder_version="4.25.0" _module_preset="default" theme_builder_area="post_content" hover_enabled="0" sticky_enabled="0"]

    The UBX Tank is built almost entirely in SS steel, the quality feels and the weight proves it, almost 60gr is not few.
    Much Spare parts are supplied in the kit; some o-rings, two Drip-Tip 510 and a 4ml bubble glass.

    AFC ring is equipped with limit switches in both directions of rotation and it is possible to adjust it with precision both for an open DTL vape and for an MTL vape, if you want you can also adjust it in a very suffocated way.

    Top-Cap opens by slide, there is no child safety, but even here you can feel the quality of Lost-Vape, thanks to the precision of workmanship it is practically impossible that the Top-Cap can accidentally open.

    By unscrewing the deck and using the “Push and Pull” method (with empty tank) you can connect / disconnect all the UB-Coils.

    [/et_pb_text][et_pb_image _builder_version="4.25.0" _module_preset="default" theme_builder_area="post_content" alt="lost vape" src="http://headless.local/wp-content/uploads/2024/05/14-1.webp" hover_enabled="0" sticky_enabled="0"][/et_pb_image][et_pb_image _builder_version="4.25.0" _module_preset="default" theme_builder_area="post_content" alt="lost vape" src="http://headless.local/wp-content/uploads/2024/05/15-1.webp" hover_enabled="0" sticky_enabled="0"][/et_pb_image][et_pb_text _builder_version="4.25.0" _module_preset="default" theme_builder_area="post_content" hover_enabled="0" sticky_enabled="0"]

    Coils Ultra Boost:
    The Vaping tests I carried out with the Gemini Hybrid 80W took place simultaneously with those of the BTB 100W, this is because both the Gemini Hybrid pod-tank and the UBX Tank adopt the same coils.
    Some of these coils such as the 1.0Ω UB and the UB M4 have recently been modified by Lost vape specifically to be able to mount the AFC in the Gemini Hybrid pod, but are still compatible in the UBX Tank.
    The liquids I used are the same for both reviews.

    – Coil Ultra Boost MTL 1.0Ω range 8-15W:
    With this resistance I used a liquid 50/50 at 4mg / ml of my production with Tob-Ermes aroma. The Drip tip used is the narrow one specifically for MTL (same as that of the Gemini Hybrid).

    The chipset of the BTB (like that of the Hybrid) is able to activate the coil (not mesh) surprisingly well already starting from 5W, given the similarities found with the Gemini Hybrid I went directly to 13.5W.

    The excellent performance (extensively described in the Gemini Hybrid review) is perfectly replicated with some slight differences. The Puff is more open with the Tank UBX but only with the slots fully open.

    The real surprise was using the two smaller holes (I think they are 0.5mm), with this configuration the MTL puff is fantastic, in line with that of the Gemini Hybrid, the AFC adjustment allows comfortable and very fine adjustments. Perhaps the UBX Tank heats up more by compulsively vaping. The Gemini Hybrid pod is made of PCTG while the UBX Tank is made of steel so it makes sense that the heat transfer is higher.

    – Mesh Coil Ultra Boost M4 from 0.2Ω range 40-60W:
    With this resistance I used the wide 510 Drip-Tip supplied in the kit (the same as that of the Gemini Hybrid), the liquid chosen was the Tropical from Tob, 70/30 at 0mg / ml.

    Again, the performance is absolutely comparable to that recorded with the Gemini Hybrid.
    With the Gemini Hybrid I had found my Best-Vaping at 45W with the air ring completely open, or as a second option at 35W closing the air-flow at 50%.
    With the Tank UBX you can risk something more, like high wattage, the best performance with open air-flow in this case is 50W.

    Having also available the old 0.3Ω and 0.6Ω UB coils (not usable with the Gemini Hybrid AFC) I took the opportunity to try them with the UBX tank.

    – Mesh Coil Ultra Boost M1 from 0,3Ω range 30-40W
    With this Coil made for the Flavor / Lung puff, I used Tropical from Tob, 70/30 at 0mg / ml.
    The aromatic yield at 40W is similar to the previous 0.2Ω UB M4, at this wattage it is a bit exasperate, however it seems to resist, I recommend using it at 30W for a longer duration of resistance, the taste is good even if it does not reach the high performance of the UB M4 in terms of vapor emission, however I find it pleasant with AFC adjusted to 50%.

    – Mesh Coil Ultra Boost M2 from 0.6Ω range 20-28W
    Made for a DTL puff, I particularly liked using it at 20W with the AFC rather closed and with the wide Drip-Tip, the vapor is not hot and the puff is quite contrasted, during my tests I also set it to 25w and vape was very satisfying, the puff is more open than the 1.0Ω coil, however I would dare to call it MTL / open.

    The UBX Tank is cleverly crafted and works beautifully, it doesn’t leak a drop of liquid and it fits perfectly with all the coils I’ve tried. I think this is due to the precise adjustment of the AFC, I had felt almost the same sensations with the old Melo 5 but I must say that the yield of the Tank UBX and its Coils is much more flexible, with superior performance. It does not matter that the UBX tank does not have locking mechanisms or safety devices for children.

    I promote it: PRESALE-ULTRA BOOST X TANK

    [/et_pb_text][et_pb_image _builder_version="4.25.0" _module_preset="default" theme_builder_area="post_content" alt="lost vape" src="http://headless.local/wp-content/uploads/2024/05/16-1.webp" hover_enabled="0" sticky_enabled="0"][/et_pb_image][et_pb_text _builder_version="4.25.0" _module_preset="default" theme_builder_area="post_content" hover_enabled="0" sticky_enabled="0"]

    Lost Vape BTB 100W:
    Maybe 100W for a single 18650 is an exaggerated value, however I vape very well even at 60W with the M4 coil.
    In vape I hardly go beyond 60W, if I have to do it I do it with a dual battery.
    With the BTB 100W and its chipset I found the same excellent performance as the Gemini Hybrid 80W, excellent responsiveness and excellent management of battery life.

    [/et_pb_text][et_pb_image _builder_version="4.25.0" _module_preset="default" theme_builder_area="post_content" alt="lost vape" src="http://headless.local/wp-content/uploads/2024/05/17-1.webp" hover_enabled="0" sticky_enabled="0"][/et_pb_image][et_pb_text _builder_version="4.25.0" _module_preset="default" theme_builder_area="post_content" hover_enabled="0" sticky_enabled="0"]

    The 0.96 “OLED screen has 6 very bright background colors and offers a fairly good view of the fonts.
    the screen shows all the information useful for vaping except the OHM reading in the VW configuration.
    To read them it is therefore necessary to switch to VV mode.

    [/et_pb_text][et_pb_image _builder_version="4.25.0" _module_preset="default" theme_builder_area="post_content" alt="lost vape" src="http://headless.local/wp-content/uploads/2024/05/18-1.webp" hover_enabled="0" sticky_enabled="0"][/et_pb_image][et_pb_text _builder_version="4.25.0" _module_preset="default" theme_builder_area="post_content" hover_enabled="0" sticky_enabled="0"]

    How the Lost Vape BTB 100W works:

    The evolved circuit of the Gemini Hybrid maintains all the previous positive aspects in this new version (BTB 100W), with the addition of the Mode selection button that makes navigating the menu even faster and more intuitive.

    – To turn on / off the device, five clicks on the fire button are required in less than two seconds.
    – Sleep mode is automatically activated after 10s of inactivity.
    – To lock / unlock the wattage press the Up / Mode buttons simultaneously.
    – The wattage with the mod unlocked is activated with the Up / Down keys with an increase and decrease of 0.5W at a time from 5 to 100W.
    – The voltage with the mod unlocked is activated with the Up / Down keys with an increase and decrease of 0.1V at a time from 1 to 7W.
    – To enter the menu with Mod unlocked, lightly press the Mode key, the current mode lights up red, press the Up / Down keys to choose between the modes among (VW, VV, TC-SS, TC-NI, TC-Ti ), then confirm the selected mode by pressing and holding the Mode key.
    – TC SS / TI / NI mode has a value that can be set by pressing the Up / Down keys between 100 ° -300 ° C and 200 ° -600 ° F, confirm with the Mode key.
    – To delete the puff number, press the Down / Mode keys simultaneously.
    – To change one of the six screen colors, press and hold the Mode button for two seconds.
    – No Pass-Through the device warns on the screen that it is not allowed to vape while charging for safety reason.
    – Low battery the device warns on the screen that the battery charge level is low.
    – Check atomizer the device warns on the screen that it does not detect the atomizer.
    – Short circuit the device warns on the screen that the resistive value is less than 0.1Ω.
    – Too hot, when the device reaches a board temperature above 80 °, it stops and restores below 60 °.
    – Over 10s, the device locks for safety when 10s of continuous delivery are reached.

    [/et_pb_text][et_pb_image _builder_version="4.25.0" _module_preset="default" theme_builder_area="post_content" alt="lost vape" src="http://headless.local/wp-content/uploads/2024/05/19-1.webp" hover_enabled="0" sticky_enabled="0"][/et_pb_image][et_pb_text _builder_version="4.25.0" _module_preset="default" theme_builder_area="post_content" hover_enabled="0" sticky_enabled="0"]

    HighLights “Back to Basic 100W Box Mod Kit”:

    Pro:
    – Aesthetically beautiful with quality finishes.
    – Compact size.
    – Construction materials.
    – Simple design.
    – Super precise battery cover.
    – Easy to navigate chipset with additional Mode button.
    – Instant power delivery.
    – Good battery management.
    – 18650 power supply.
    – 0.96 inch color TFT screen with 6 colors.
    – Support SS / TI / NI in temperature control mode.
    – USB-C Fast charging
    – Replaceable 510 DL / MTL Drip Tip.
    – 4ml bubble glass with quick refill slide.
    – Innovative super effective Airflow for MTL & DL
    – Non-existent condensation formation with any coil.

    Tips:
    Volts not indicated on the watts screen.

    Thanks to Lost Vape for making this kit available for review: BTB 100W STARTER KIT

    [/et_pb_text][et_pb_image _builder_version="4.25.0" _module_preset="default" theme_builder_area="post_content" alt="lost vape" src="http://headless.local/wp-content/uploads/2024/05/20b.webp" hover_enabled="0" sticky_enabled="0"][/et_pb_image][et_pb_code _builder_version="4.25.0" _module_preset="default" theme_builder_area="post_content" hover_enabled="0" sticky_enabled="0"]Share On:[Sassy_Social_Share][/et_pb_code][/et_pb_column][/et_pb_row][/et_pb_section]

  • Lost Vape Centaurus DNA 250C Review: Legendary Reborn

    Lost Vape Centaurus DNA 250C Review: Legendary Reborn

    [et_pb_section fb_built="1" theme_builder_area="post_content" _builder_version="4.25.0" _module_preset="default" background_color="#000000" hover_enabled="0" sticky_enabled="0"][et_pb_row _builder_version="4.25.0" _module_preset="default" theme_builder_area="post_content" hover_enabled="0" sticky_enabled="0"][et_pb_column _builder_version="4.25.0" _module_preset="default" type="4_4" theme_builder_area="post_content"][et_pb_image src="http://headless.local/wp-content/uploads/2024/05/centaurus-2.webp" _builder_version="4.25.0" _module_preset="default" theme_builder_area="post_content" alt="lost vape" hover_enabled="0" sticky_enabled="0" align="center"][/et_pb_image][et_pb_text _builder_version="4.25.0" _module_preset="default" theme_builder_area="post_content" hover_enabled="0" sticky_enabled="0"]

    Lost Vape Centaurus DNA 250C Review: Legendary Reborn

    /in News/by Administrator

    [/et_pb_text][et_pb_text _builder_version=”4.25.0″ _module_preset=”default” theme_builder_area=”post_content” hover_enabled=”0″ sticky_enabled=”0″]

    Here we are in 2020 and the day has finally come. The Lost Vape Centaurus DNA250C is Lost Vape’s new dual 18650 box mod and, as the name suggests, it uses the DNA250C chipset. It looks very much like the Paranormal DNA250C but there are some tweaks and changes to the body to make it more comfortable to use.

    The Centaurus DNA250C will fire at up to 200W, it supports temperature control from 200°F-600°F, and it comes with an extremely detailed menu/settings system. Like other mods that use the DNA250C chipset, the Centaurus DNA250C also has a “Replay” mode that can capture and replay the “perfect puff”. I’ll go into “Replay” mode in more detail in the review.


    Box Contents

    [/et_pb_text][et_pb_image _builder_version="4.25.0" _module_preset="default" theme_builder_area="post_content" alt="lost vape" src="http://headless.local/wp-content/uploads/2024/05/Lost-Vape-Centaurus-DNA250C-Box-Contents.webp" hover_enabled="0" sticky_enabled="0"][/et_pb_image][et_pb_text _builder_version="4.25.0" _module_preset="default" theme_builder_area="post_content" hover_enabled="0" sticky_enabled="0"]

    • 1 x Centaurus DNA250C Mod
    • 1 x USB Cable
    • 1 x USB On-The-Go Adaptor
    • 1 x Warranty Card
    • 1 x User Manual

    The way that the Centaurus DNA250C is packaged just screams quality. The box that I received is black with the Centaurus logo and “Centaurus DNA250C” printed on one side and “LOST VAPE” printed on the other side. The box for the retail version will be different and will have a picture of the mod along with some other changes.

    The box slides open like a drawer. Inside there’s a semi-transparent paper with golden stars and constellations. “LEGENDARY REBORN” is printed in gold in the center of the paper.

    Under the paper is the mod and an accessories box. There’s a gold colored ribbon that you can pull to lift the Centaurus DNA250C from the box.

    From the get-go with the unboxing, the experience already feels luxurious. This is the kind of feeling that I want to have when I purchase something expensive and Lost Vape has done an excellent job. Before you even use the mod, it already feels like the price is worth it.


    Specifications

    • 91mm x 55mm x 26mm
    • Weighs 173g
    • Stainless Steel Frame
    • Carbon Fiber Panels
    • Dual 18650 Box Mod
    • Evolv DNA250C Chipset
    • 0.90” Color Screen
    • 200W Maximum Output
    • 200°F-600°F Temperature Range
    • Fits up to 25mm Atomizers Without Overhang

    Design & Build Quality

    [/et_pb_text][et_pb_image _builder_version="4.25.0" _module_preset="default" theme_builder_area="post_content" alt="lost vape" src="http://headless.local/wp-content/uploads/2024/05/Lost-Vape-Centaurus-DNA250C-2.webp" hover_enabled="0" sticky_enabled="0"][/et_pb_image][et_pb_image _builder_version="4.25.0" _module_preset="default" theme_builder_area="post_content" alt="lost vape" src="http://headless.local/wp-content/uploads/2024/05/Lost-Vape-Centaurus-DNA250C-Performance.webp" hover_enabled="0" sticky_enabled="0"][/et_pb_image][et_pb_image _builder_version="4.25.0" _module_preset="default" theme_builder_area="post_content" alt="lost vape" src="http://headless.local/wp-content/uploads/2024/05/Lost-Vape-Centaurus-DNA250C-4.webp" hover_enabled="0" sticky_enabled="0"][/et_pb_image][et_pb_image _builder_version="4.25.0" _module_preset="default" theme_builder_area="post_content" alt="lost vape" src="http://headless.local/wp-content/uploads/2024/05/Lost-Vape-Centaurus-DNA250C-3.webp" hover_enabled="0" sticky_enabled="0"][/et_pb_image][et_pb_text _builder_version="4.25.0" _module_preset="default" theme_builder_area="post_content" hover_enabled="0" sticky_enabled="0"]

    The Lost Vape Centaurus DNA250C is a clean and good looking mod. Just from appearance, it looks high-end and more polished and refined than your every day mod.

    I got the “Black/Ostrich -Chopped Carbon Fiber” finish for my review unit and boy is it nice! The body is made of stainless steel. It’s black with a brushed/matte finish. The back of the mod has a soft, leathery grip that feels comfortable to hold. The panels are semi-reflective chopped carbon fiber — not something you see every day on a mod but it looks really classy. All of the components on this mod feel and look top-notch and opulent.

    The Centaurus DNA250C looks very much like the Paranormal DNA250C but there are a couple of notable changes. Unlike the Paranormal DNA250C, there are no screws on the corners of the Centaurus DNA250C. There is also no wood inlay on the body of the mod under the 510 plate which I think is a welcome change.

    The 510 plate on the Centaurus will fit atomizers up to 25mm in diameter without overhang. The plate is slightly raised from the rest of the mod so atomizers don’t quite sit flush. It’s barely noticeable but if you’re a stickler, you might find it annoying. I understand why they did this though; so that the atomizers won’t scrape the top of the mod. Still, I like my tanks to sit flush.

    Instead of rounded curves like the Paranormal, the Centaurus DNA250C has straight cut, slanting edges. This is especially noticeable around the front of the mod. When I hold the device to fire the Centaurus DNA250C with my index finger, my fingers sit comfortably on the slanted sides.

    The mod has a comfortable size at 91mm tall, 55mm deep and 26mm wide. It’s also weighty but not too heavy at 173g. It feels solid and well-built in my hand.

    The battery door is spring loaded and secured by a strong latch. It’s not flimsy in the least and rather feels very well designed. The door springs open when released and stays securely shut when closed. I’m usually concerned about the long-term durability of battery doors but I don’t have any concerns with this one.

    On the front of the device are four buttons: one circular firing button and three adjustment buttons. All four buttons are firm, tactile, and responsive. The firing button is positioned just right to comfortably fire with my thumb.

    The Centaurus DNA250C has a 0.90” color TFT display. It’s clear, crisp and bright. The screen displays your coil resistance, battery life percentage, your current mode, current wattage/temperature, and a settings option.


    Features & Functions: DNA250C Chipset

    [/et_pb_text][et_pb_image _builder_version="4.25.0" _module_preset="default" theme_builder_area="post_content" alt="lost vape" src="http://headless.local/wp-content/uploads/2024/05/Lost-Vape-Centaurus-DNA250C-7.webp" hover_enabled="0" sticky_enabled="0"][/et_pb_image][et_pb_text _builder_version="4.25.0" _module_preset="default" theme_builder_area="post_content" hover_enabled="0" sticky_enabled="0"]

    In the vaping world, Evolv’s DNA250C chipset is a big deal. It’s their latest chipset and it’s known as one of the most accurate, reliable and customizable chipsets out there. It’s especially good when it comes to temperature control vaping.

    When it comes to features and functions, the Centaurus DNA250C is just like any other DNA250C mod. It has an in depth menu, multiple settings that can be tweaked, and a host of modes. Lost Vape didn’t add a custom theme for the Centaurus so it uses Evolv’s default theme.

    However, you can download a theme from Evolv’s forums and upload it to the Centaurus using Evolv’s Escribe software.

    Escribe will also let you customize the UI and change the modes, however I would advise against doing this unless you know what you’re doing. If you’re not careful, tweaking the UI and modes can seriously mess up the device.

    Like other DNA devices, the Centaurus doesn’t turn off. Instead, it locks after a period of inactivity. Pressing any button five times will unlock the device.

    The Centaurus DNA250C will fire at up to 200W and supports a TC range of 200°F-600°F. Out of the box there are the following modes: Watt Boost, Watts, Replay, Kanthal, SS430, SS316, Titanium, and Nickel 200.

    To switch modes, use the top and bottom adjustment buttons to hover over the mode at the top of the screen. Use the middle adjustment button to select the mode. Using the top and bottom adjustment buttons will cycle through the modes. When you’ve found the mode you want, press the middle adjustment button again to select it.

    Here’s an explanation of the different modes:

    Watt Boost: This mode is wattage mode with preheat functionality. This boost allows for faster ramp up times which is awesome to have in power mode. First, set your desired wattage. Then go into the settings menu and into the Atomizer option. Make sure that Boost is set to “On”. Changing the Punch will alter the aggressiveness of the preheat. The Punch can be set from 1-11.

    Watts: This is your good old-fashioned wattage mode. You can actually make the default wattage mode use boost if you want to by following the same steps as listed above for Watt Boost mode. However, I prefer to leave the boost off for wattage mode so that I can just switch between the Watt Boost and Watts if I want to turn the boost on or off.

    Replay: Replay mode is essentially an easier way of using temperature control. Replay mode only works as long as there’s temperature control compatible wire in your build. This means that while kanthal won’t work with replay, a kanthal/SS316L combo wire will.

    All you have to do is go into Replay mode and select your desired wattage. Then, vape until it gets to a temperature that you like. From here, select save puff. Now the screen will say “Playing” and it will keep your vape at the same temperature that you saved. This takes away having to select the correct material or figuring out what temperature you want to vape at. It’s a simplified and easier to use TC mode that works exceptionally well.

    Kanthal, SS430, SS316, Titanium, and Nickel 200: These are your temperature control modes. Select the correct mode for your wire and set your desired wattage and temperature. The chipset will take care of the rest.


    Lost Vape Centaurus DNA250C Settings

    [/et_pb_text][et_pb_image _builder_version="4.25.0" _module_preset="default" theme_builder_area="post_content" alt="lost vape" src="http://headless.local/wp-content/uploads/2024/05/Lost-Vape-Centaurus-DNA250C-8-Diagnostics.webp" hover_enabled="0" sticky_enabled="0"][/et_pb_image][et_pb_text _builder_version="4.25.0" _module_preset="default" theme_builder_area="post_content" hover_enabled="0" sticky_enabled="0"]

    In addition to the modes, the settings menu is rather detailed. Here you’ll find Atomizer, Puff Info, Diagnostics, and System.

    Atomizer: This provides info on your coil, like the resistance. You can re-measure the resistance here if you believe that it’s displaying incorrectly. You can also change the wattage and temperature as well as adjust the preheat level and turn it on or off.

    Puff Info: This is a log of all of your puffs that you’ve taken. It shows information for each of your puffs with a chart of the wattage, temperature and battery consumption of each puff. Very neat stuff.

    Diagnostics: Here you’ll find everything about your build and batteries, even the temperature of the board.

    System: In the system menu you can change the brightness of the screen, set the time and date, and change the temperature units from Celsius to Fahrenheit.


    Power Bank Functionality

    An interesting feature of the Centaurus DNA250C is its power bank functionality. Using the included On-The-Go adaptor you can charge your cellphone or any other device that uses USB. Just plug the adaptor into the Centaurus DNA250C, then plug your charging cable into the other end. This obviously drains the batteries very quickly so I wouldn’t use it unless you’re absolutely in a pinch but it’s a neat feature to say the least.


    Performance

    [/et_pb_text][et_pb_image _builder_version="4.25.0" _module_preset="default" theme_builder_area="post_content" alt="lost vape" src="http://headless.local/wp-content/uploads/2024/05/Lost-Vape-Centaurus-DNA250C-Performance-1.webp" hover_enabled="0" sticky_enabled="0"][/et_pb_image][et_pb_text _builder_version="4.25.0" _module_preset="default" theme_builder_area="post_content" hover_enabled="0" sticky_enabled="0"]

    I’ve been using the Centaurus for a few weeks now and in that time I’ve used it with a bunch of different tanks. RDAs, RTAs and Sub-Ohm tanks have all had their turn atop this baby. You’re probably wondering how they all performed. To that, I say: they’ve never been better.

    All of my tanks looked excellent sitting on top of the Centaurus DNA250C, certainly a selling point of this mod. But the real selling point, of course, is how well they performed.

    Wattage mode worked flawlessly. I didn’t test if the mod was actually outputting the wattage that it displayed. But from pure feeling alone, it felt like it was outputting correctly. Wattage boost gives noticeably quicker ramp up times so I liked using it for my kanthal coils. Setting the boost to 5 gave me the best results.

    If you’ve ever used any other DNA250C mods then you’ll already know the following, but temperature control vaping with the Centaurus is unlike any other non-DNA chip mod. It reaches temperature quickly and accurately and it throttles correctly at the right time. The throttling isn’t too aggressive and works just right.

    One of my best experiences with this mod was when paired with the OFRF Nexmesh tank using the SS316L coils. With the wattage set to 80W and temperature at 450°F it’s a heavenly vape. Just the right level of warmth and it’s flavor heaven. The draw is consistent every time with the same warmth and draw. Not once did it burn.

    Just as good as the temperature control mode is the replay mode. No matter what coil I used, it worked flawlessly. Whether combo wire or straight SS, the replay mode accurately and consistently replayed my saved puffs. If you want to get into TC vaping but you’re on the fence, using Replay will allow you to see what all the hype is about and ease yourself into using TC.


    Verdict

    [/et_pb_text][et_pb_image _builder_version="4.25.0" _module_preset="default" theme_builder_area="post_content" alt="lost vape" src="http://headless.local/wp-content/uploads/2024/05/Lost-Vape-Centaurus-DNA250C-6.webp" hover_enabled="0" sticky_enabled="0"][/et_pb_image][et_pb_text _builder_version="4.25.0" _module_preset="default" theme_builder_area="post_content" hover_enabled="0" sticky_enabled="0"]

    If you haven’t guessed already, my verdict for the Centaurus DNA250C is an overwhelmingly positive one. It’s certainly one of the best looking mods out there and the build quality is exceptional. It’s going to cost you more than your average mod but the high-end design, finishes and panels are worth the cost. In a way, Lost Vape’s DNA mods are the luxury goods of the vape world.

    In addition to the attractive design and solid build quality, the DNA250C chip is an amazing performer. No matter what mode you use, you’re getting the absolute best performance available from a vape mod. This is especially true for the temperature control and replay modes. Plus, the ability to change the theme along with the level of customization available just blows every other non-DNA mod out of the water.

    The only negative point I have about the Centaurus DNA250C is that the 510 plate doesn’t sit flush. But when you consider how much good this mod has going on, this is a relatively minor con in comparison.

    If you don’t have a Paranormal and you’re willing to shell out the extra dollars, the Centaurus DNA250C is an excellent choice for a dual battery mod.

    [/et_pb_text][et_pb_code _builder_version=”4.25.0″ _module_preset=”default” theme_builder_area=”post_content” hover_enabled=”0″ sticky_enabled=”0″]Share On:[Sassy_Social_Share][/et_pb_code][/et_pb_column][/et_pb_row][/et_pb_section]

  • LOST VAPE ORION Q-ULTRA 40W POD SYSTEM REVIEW

    LOST VAPE ORION Q-ULTRA 40W POD SYSTEM REVIEW

    [et_pb_section fb_built="1" theme_builder_area="post_content" _builder_version="4.25.0" _module_preset="default" background_color="#000000" hover_enabled="0" sticky_enabled="0"][et_pb_row _builder_version="4.25.0" _module_preset="default" theme_builder_area="post_content"][et_pb_column _builder_version="4.25.0" _module_preset="default" type="4_4" theme_builder_area="post_content"][et_pb_image src="http://headless.local/wp-content/uploads/2024/05/1231-1210×423-1.webp" _builder_version="4.25.0" _module_preset="default" theme_builder_area="post_content" alt="lost vape" align="center" hover_enabled="0" sticky_enabled="0"][/et_pb_image][et_pb_text _builder_version="4.25.0" _module_preset="default" theme_builder_area="post_content" hover_enabled="0" sticky_enabled="0"]

    LOST VAPE ORION Q-ULTRA 40W POD SYSTEM REVIEW

    /in News/by Administrator

    [/et_pb_text][et_pb_image _builder_version="4.25.0" _module_preset="default" theme_builder_area="post_content" alt="lost vape" src="http://headless.local/wp-content/uploads/2024/05/Lost-Vape-Orion-Q-ULTRA-40W-Pod-System-Review.webp" hover_enabled="0" sticky_enabled="0"][/et_pb_image][et_pb_text _builder_version="4.25.0" _module_preset="default" theme_builder_area="post_content" hover_enabled="0" sticky_enabled="0"]

    Quality

    The Lost Vape Orion Q-ULTRA 40W Pod System is the latest AIO device released in 2020 from the hugely popular Quest line. This new model introduces some welcomed hardware changes that include a much larger battery, double the power output, and up to 4ml eliquid capacity. If you enjoyed or missed out on the previous Orion Q-PRO, I’d highly recommend reading this detailed and very honest review.

    Lost Vape is a well-known vape manufacturer that specializes in developing pod based devices. They established themselves in 2014, but only recently became renowned in 2018 thanks to the original Orion DNA GO. Lost Vape currently boasts two fantastic lines that include the Quest and DNA. Their dedication to continuous improvement really shines through in the Orion Q-ULTRA. To find out why by reading the below remarks.

    [/et_pb_text][et_pb_image _builder_version="4.25.0" _module_preset="default" theme_builder_area="post_content" alt="lost vape" src="http://headless.local/wp-content/uploads/2024/05/Lost-Vape-Orion-Q-ULTRA-40W-Pod-Starter-Kit-Review.webp" hover_enabled="0" sticky_enabled="0"][/et_pb_image][et_pb_text _builder_version="4.25.0" _module_preset="default" theme_builder_area="post_content" hover_enabled="0" sticky_enabled="0"]

    Pod

    The Lost Vape Orion Q-ULTRA 40W Pod System is much larger than previous renditions, measuring 105mm’s by 43.2mm’s by 16.5mm’s. This is because Lost Vape has incorporated a massive 1600mAh battery within the main chassis. Compare that to the last Orion device that only featured a 950mAh battery. As a result, you can easily get a few days or so worth of charge out of the Q-ULTRA.

    The power output is also much higher. Its new range is between 5 and 40 watts! That’s more than enough to appease most MTL and DTL vapers. Lost Vape released a bunch of new press-fit coil heads for the Q-ULTRA. This includes a 0.3, 0.6, and 1.0ohm. I personally enjoyed the lower ohm coil. It delivered fantastic true to taste flavor and decent clouds. The airflow is also fully adjustable via a ring that sits under the 510 drip trip.

    [/et_pb_text][et_pb_image _builder_version="4.25.0" _module_preset="default" theme_builder_area="post_content" alt="lost vpae" src="http://headless.local/wp-content/uploads/2024/05/Lost-Vape-Orion-Q-ULTRA-40W-AIO-4ml-Pod-Review.webp" hover_enabled="0" sticky_enabled="0"][/et_pb_image][et_pb_text _builder_version="4.25.0" _module_preset="default" theme_builder_area="post_content" hover_enabled="0" sticky_enabled="0"]

    The zinc alloy construction and stabwood styled panels have been swapped out for aluminum alloy and textured plastic. While it doesn’t feel or look as nice anymore, it’s much more durable and lightweight. Overall I think this was a smart move to extend the longevity and accessibility of the device. On the front face are a cartridge release, decent sized 0.69″ inch OLED screen, fire button, and adjustment buttons.

    It would always adjust the watts after I turned the device off, then on again. I’m sure though this will be fixed in future updates. You can use your ultra-quick Type-C USB port to access the latest version.

    [/et_pb_text][et_pb_image _builder_version="4.25.0" _module_preset="default" theme_builder_area="post_content" alt="lost vape" src="http://headless.local/wp-content/uploads/2024/05/Lost-Vape-Orion-Q-ULTRA-40W-Vape-Pod-Mod-System-USA-Review.webp" hover_enabled="0" sticky_enabled="0"][/et_pb_image][et_pb_text _builder_version="4.25.0" _module_preset="default" theme_builder_area="post_content" hover_enabled="0" sticky_enabled="0"]

    Price

    The Lost Vape Orion Q-ULTRA 40W Pod System is currently available for pre-order. The best price I could find online was $39.90 USD from Vapesourcing. I think that’s a bit expensive for a pod device, but you can make it a bit cheaper by using our exclusive 12% off coupon code ‘WWM12’ at checkout. I’d happily recommend buying the Q-ULTRA because of the overall quality and performance of the device. You can also opt-in for an RBA base.

    Packaging

    The Lost Vape Orion Q-ULTRA 40W Pod System is currently available in a variety of colors and textures. This includes carbon fiber black, nebula purple, marble white, leather black, linen grey, and also exotic fantasy. I was really impressed by the unique panel options, though still prefer the old ones. The packaging is modern and presents well. Inside you’ll find a Q-ULTRA battery, cartridge, 2 x coils, charging cable, and also a user manual.

    Comment down below what you thought of the Lost Vape Orion Q-ULTRA 40W Pod System.

    [/et_pb_text][et_pb_code _builder_version=”4.25.0″ _module_preset=”default” theme_builder_area=”post_content” hover_enabled=”0″ sticky_enabled=”0″]Share On:[Sassy_Social_Share][/et_pb_code][/et_pb_column][/et_pb_row][/et_pb_section]
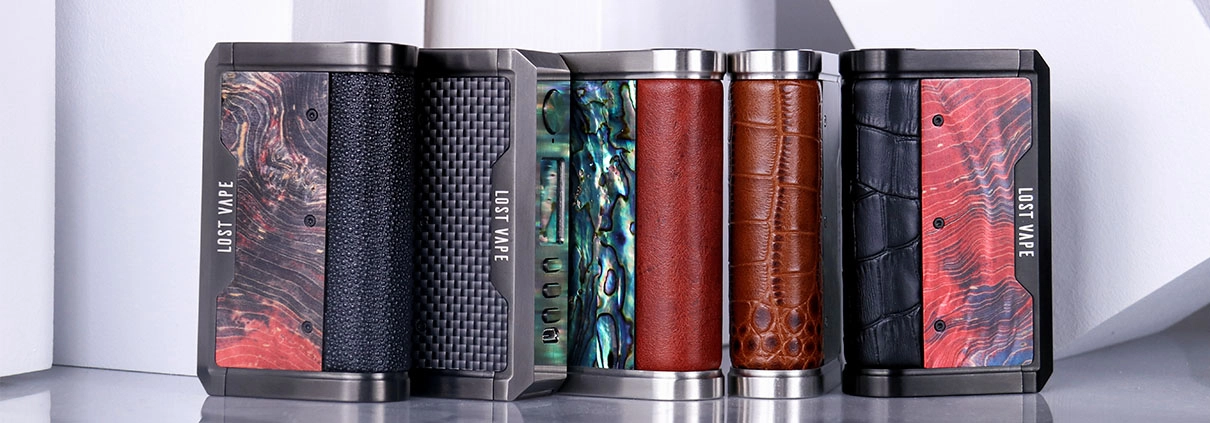
  • Lost Vape Q Pro Pod Kit Review – On A Quest For the Perfect Pod Mod!

    Lost Vape Q Pro Pod Kit Review – On A Quest For the Perfect Pod Mod!

    [et_pb_section fb_built="1" theme_builder_area="post_content" _builder_version="4.25.0" _module_preset="default" background_color="#000000" hover_enabled="0" sticky_enabled="0"][et_pb_row _builder_version="4.25.0" _module_preset="default" theme_builder_area="post_content"][et_pb_column _builder_version="4.25.0" _module_preset="default" type="4_4" theme_builder_area="post_content"][et_pb_image src="http://headless.local/wp-content/uploads/2024/05/MC20-12.webp" _builder_version="4.25.0" _module_preset="default" theme_builder_area="post_content" alt="lost vape" hover_enabled="0" sticky_enabled="0" align="center"][/et_pb_image][et_pb_text _builder_version="4.25.0" _module_preset="default" theme_builder_area="post_content" hover_enabled="0" sticky_enabled="0"]

    Lost Vape Q Pro Pod Kit Review – On A Quest For the Perfect Pod Mod!

    /in News/by Administrator

    [/et_pb_text][et_pb_text _builder_version=”4.25.0″ _module_preset=”default” theme_builder_area=”post_content” hover_enabled=”0″ sticky_enabled=”0″]

    Sexy New Stabwood Panels and Five Power Levels Is This the Pod Mod To Rule Them All?

    The Lost Vape Q Pro is the latest in the extremely popular Orion pod mod series.

    The Orion range of vape kits have certainly set the standard for today’s pod kit market with many companies adopting the overall design.

    You might say some have succeeded – whilst others have failed.

    Having not tried any of the others…I couldn’t possibly comment.

    However, imitation, they say, is the sincerest form flattery ?

    Lost Vape are what you might call semi-high end, as in their devices are just about affordable.

    Here at EcigClick we’ve had the privilege of reviewing very many of the company’s products, with standouts being: my personal favourite the Lost Vape Triade DNA 250c – the Paranormal DNA250C – and the recently released Lyra pod kit.

    I’ve also been fortunate enough to review all of the Orion series including the Orion DNA Plus and the previous version of this one – the Orion Q .

    Great company and generally great products – so I’m expecting big things from the Q Pro.

    What Can We Expect From the Lost Vape Q Pro?

    As I always say and particularly when I’m looking at pod kits/mods – I’m hoping above all else for great flavour.

    Add to that a good build and design and if the Lost vape Q Pro ticks those boxes I’ll be happy.

    [/et_pb_text][et_pb_image _builder_version="4.25.0" _module_preset="default" theme_builder_area="post_content" alt="lost vape" src="http://headless.local/wp-content/uploads/2024/05/Q-PRO-6-705×685-1.webp" hover_enabled="0" sticky_enabled="0"][/et_pb_image][et_pb_text _builder_version="4.25.0" _module_preset="default" theme_builder_area="post_content" hover_enabled="0" sticky_enabled="0"]

    As this an upgrade to the original I’m also hoping the new 5 power levels will allow me to really tailor my vape and the inclusion of the 0.25ohm mesh coil is very interesting.

    The school of thought is that mesh really bumps the flavour – mostly – and we shall see if this is the case with the Q Pro.

    Q BTW stands for Quest – so let’s see if our quest for the perfect vape is over.

    For the record this was sent to me free of charge for the purpose of this review direct from Lost Vape – thank you – and as always freebies do not sway my thoughts and opinions.

    Inside the Box

    Smart and functional packaging and inside you’ll find:

    • Lost Vape Q-Pro 950mAh Device
    • Lost Vape Q-Pro 2ml Replacement Pod
    • Lost Vape Q-Pro 1.0 Ohm Coil (Pre-Installed)
    • Lost Vape Q-Pro 0.5 Ohm Coil
    • Lanyard
    • Micro USB Charging Cable
    • User Manual

    [/et_pb_text][et_pb_image _builder_version="4.25.0" _module_preset="default" theme_builder_area="post_content" alt="lost vape" src="http://headless.local/wp-content/uploads/2024/05/lost-vape-q-pro-contents.webp" hover_enabled="0" sticky_enabled="0"][/et_pb_image][et_pb_text _builder_version="4.25.0" _module_preset="default" theme_builder_area="post_content" hover_enabled="0" sticky_enabled="0"]

    Lost Vape Q Pro Specs and Features

    • 950mAh internal battery
    • x5 power levels
    • 5 to 24w output
    • Top fill
    • Adjustable airflow
    • MTL and DTL coils
    • Size: 93 x 37 x 13.5
    • 2ml capacity
    • x3 compatible coils
    • Compatible with other Orion series coils
    • Wide range of colour/finish options

    Lost Vape Q Pro Quick Start Guide

    • Unscrew pod top cap for filling
    • Prime coil for at least 5 minutes
    • Press fire button x5 to lock/unlock
    • Twist ring on drip tip to alter airflow
    • Battery indicator: Red= 0-8% Blue= 8-50% and Green= 50-100%
    • Use select button to choose power level

    Read more: Why You Need To Prime Your Coils

    Key Features

    Apart from the option of three stunning new stabwood panel versions, and a total choice of 13 snazzy colour combos, not a lot has changed on the outside.

    It is of course the inside – or should that be the chip – that’s had a major makeover.

    The previous Orion Quest maxed out at 17w – the new Lost Vape Orion Q Pro has been bumped up to 24w and now has x5 power levels.

    This means the 0.25ohm mesh coil with the airflow open should technically give us a decent Direct To Lung [DTL] vape – we shall of course see if that’s the case.

    These power levels are dependent on the coil you’re using and to scroll through the options you press the select button [by the USB port] and release when you’re happy.

    As the Lost Vape Orion Q Pro does not have the DNA GO chip inside – this is the only way to tailor your perfect vape.

    There are far too many options for each coil to list here – see the image below.

    However what I will say is, the light will show you what level you’re at in increments.

    [/et_pb_text][et_pb_image _builder_version="4.25.0" _module_preset="default" theme_builder_area="post_content" alt="lost vape" src="http://headless.local/wp-content/uploads/2024/05/lost-vape-q-pro-power-levels.webp" hover_enabled="0" sticky_enabled="0"][/et_pb_image][et_pb_text _builder_version="4.25.0" _module_preset="default" theme_builder_area="post_content" hover_enabled="0" sticky_enabled="0"]

    White is the lowest going through: Blue – Red – Yellow and with Purple the max.

    As for other key features – they’re all pretty similar to those that have come before!

    Easy top-fill – easyish coil replacement [see later] and adjustable airflow.

    Lost Vape Q Pro Coil Compatibility

    These are the coils the new version is compatible with:

    • Q-PRO 1.0ohm regular coil
    • ORION PLUS 0.25ohm mesh coil and 0.5ohm regular coil
    • ORION Q 1.0ohm pod cartridge
    • ORION DNA Go 0.25ohm and o.5ohm pod cartridge

    [/et_pb_text][et_pb_image _builder_version="4.25.0" _module_preset="default" theme_builder_area="post_content" alt="lost vape" src="http://headless.local/wp-content/uploads/2024/05/MC20-4-1030×672-1.webp" hover_enabled="0" sticky_enabled="0"][/et_pb_image][et_pb_text _builder_version="4.25.0" _module_preset="default" theme_builder_area="post_content" hover_enabled="0" sticky_enabled="0"]

    See the image above for what coils the Lost Vape Orion Q Pro is and isn’t compatible with!

    Design and Build Quality

    I’ve been fortunate enough to review and actually buy a number of Lost Vape products and always seem to say the same thing…

    The build is always excellent – near perfect in many cases.

    The Lost Vape Orion Q Pro pod kit is no different – well maybe.

    I’ve always had an issue replacing the coils – they can be a sod to get out.

    Until that is, I saw a ‘tip’ where partially unscrewing the drip tip and using that to press down on the coil makes life a lot easier!

    [/et_pb_text][et_pb_image _builder_version="4.25.0" _module_preset="default" theme_builder_area="post_content" alt="lost vape" src="http://headless.local/wp-content/uploads/2024/05/easy-coil-removal.webp" hover_enabled="0" sticky_enabled="0"][/et_pb_image][et_pb_text _builder_version="4.25.0" _module_preset="default" theme_builder_area="post_content" hover_enabled="0" sticky_enabled="0"]

    Simple!

    Airflow Adjustment!

    I also have difficulty with adjusting the airflow on all of the Orion’s I’ve used.

    Some can freewheel, whilst others feel as though they need a bit of WD40 – not recommended – don’t try that at home kids!

    [/et_pb_text][et_pb_image _builder_version="4.25.0" _module_preset="default" theme_builder_area="post_content" alt="lost vape" src="http://headless.local/wp-content/uploads/2024/05/airflow-control.webp" hover_enabled="0" sticky_enabled="0"][/et_pb_image][et_pb_text _builder_version="4.25.0" _module_preset="default" theme_builder_area="post_content" hover_enabled="0" sticky_enabled="0"]

    Even juiced up it’s hit and miss if your pod is a bit on the stiff or loose side.

    In this case one of the pods was perfect, whilst the other took a bit of breaking in, and even then was extremely stiff to move on the fly.

    I guess it’s the luck of the draw.

    Otherwise it looks as good as ever and the stainless steel greenish blue stabwood version I received looks as sexy as hell.

    [/et_pb_text][et_pb_image _builder_version="4.25.0" _module_preset="default" theme_builder_area="post_content" alt="lost vape" src="http://headless.local/wp-content/uploads/2024/05/lost-vape-q-pro-logo.webp" hover_enabled="0" sticky_enabled="0"][/et_pb_image][et_pb_text _builder_version="4.25.0" _module_preset="default" theme_builder_area="post_content" hover_enabled="0" sticky_enabled="0"]

    There’s quite a few logos and the Lost Vape name dotted about – but they look very classy and not at all in your face.

    How Does the Lost Vape Q Pro Perform?

    Lost Vape kindly sent me all three coils and I have been putting them through their paces for almost 2 weeks.

    That extra power and the inclusion of the 0.25ohm coil suggests we should be able to get a decent DTL vape out of the Lost Vape Orion Q Pro – I’ll look at that in a mo’.

    [/et_pb_text][et_pb_image _builder_version="4.25.0" _module_preset="default" theme_builder_area="post_content" alt="lost vape" src="http://headless.local/wp-content/uploads/2024/05/lost-vape-q-pro-logo-1.webp" hover_enabled="0" sticky_enabled="0"][/et_pb_image][et_pb_text _builder_version="4.25.0" _module_preset="default" theme_builder_area="post_content" hover_enabled="0" sticky_enabled="0"]

    OK, let’s start with the highest resistance coil that comes already installed.

    Read more: Mouth To Lung (MTL) VS Direct To Lung (DTL) – What’s the Difference?

    Lost Vape Q Pro 1.0ohm Regular Coil

    Lost Vape recommends this one between 8w to a max of 16w – as we’ve seen that means white light for low and purple for full power.

    The lowest setting gave me a bit of a limp vape, however it was surprisingly tasty if a little cool – as you might expect – with hardly any vapour.

    [/et_pb_text][et_pb_image _builder_version="4.25.0" _module_preset="default" theme_builder_area="post_content" alt="lost vape" src="http://headless.local/wp-content/uploads/2024/05/q-pro-1ohm-regular-coil.webp" hover_enabled="0" sticky_enabled="0"][/et_pb_image][et_pb_text _builder_version="4.25.0" _module_preset="default" theme_builder_area="post_content" hover_enabled="0" sticky_enabled="0"]

    I actually found the high power setting of 16w a little too much on this coil – which surprised me somewhat – it’s hardly what you’d call high wattage!

    I’m struggling to say why as it wicked well – gave good flavour and of course meant a very extended battery life.

    We’re all different and I was much happier at 14w!

    With the airflow shut right down this was the perfect MTL vape and I was getting great flavour from my chosen Nic Salts from Pachamama – very tasty!

    Read more: Guide To Nicotine Salt E Juice and Best Nic Salt Brands

    Lost Vape Q Pro 0.5ohm Regular Coil

    Best between 12 and 20w.

    This is a kind of mid-range coil, neither MTL nor DTL but something er in the middle!

    And to be honest, that’s the vape I’m getting from it, and still can’t make up my mind which way to use it!

    [/et_pb_text][et_pb_image _builder_version="4.25.0" _module_preset="default" theme_builder_area="post_content" alt="lost vape" src="http://headless.local/wp-content/uploads/2024/05/q-pro-0-5ohm-coil.webp" hover_enabled="0" sticky_enabled="0"][/et_pb_image][et_pb_text _builder_version="4.25.0" _module_preset="default" theme_builder_area="post_content" hover_enabled="0" sticky_enabled="0"]

    Trust me that’s a good thing as it means you really can switch your vape style on the fly!

    Shut down the airflow and vape midway at 16w, and you get an extremely flavoursome MTL vape.

    Open her up and bump the power to max and yup – you get a VERY passable lung hit [DTL] without too much restriction.

    There’s no dip in flavour either and the clouds whilst not mega – were more than passable.

    I found a happy medium on this one with the airflow half open at 18w.

    Lost Vape Q Pro 0.25 Mesh Coil

    So is this is the coil I was looking for on my quest for the perfect vape?

    In a word, ab-so-lutely!

    [/et_pb_text][et_pb_image _builder_version="4.25.0" _module_preset="default" theme_builder_area="post_content" alt="lost vape" src="http://headless.local/wp-content/uploads/2024/05/q-pro-25-ohm-coil.webp" hover_enabled="0" sticky_enabled="0"][/et_pb_image][et_pb_text _builder_version="4.25.0" _module_preset="default" theme_builder_area="post_content" hover_enabled="0" sticky_enabled="0"]

    Oh boy is this one an absolute flavour machine and then some!

    I thought I’d been spoiled by the previous 2 coils – but this one is in a class of its own.

    Enough gushing…

    At its lowest setting of 15w with the airflow fully open the flavour was excellent, again a little on the cool side.

    It gets better the higher you push it and at its max of 24w it is nothing short of a wondrous vape – especially with the airflow ever so slightly closed.

    Good vapour for one so small but that flavour – WOW is the word.

    One of the best vapes I’ve had in a long time.

    Unfortunately this coil isn’t in the box – which is a shame or probably clever marketing ?

    I seriously suggest if you’re going to be buying the Lost Vape Orion Q Pro – you add a couple of boxes of these coils – you will not regret it!

    A Quick Note On Wicking

    I’ve had no issues whatsoever with wicking on any of the Orion kits and this one’s no different.

    Come to that – no leaking or even the threat of a leak.

    As you saw I have run nic salts through the 0.1 and 0.5ohm coil.

    [/et_pb_text][et_pb_image _builder_version="4.25.0" _module_preset="default" theme_builder_area="post_content" alt="lost vpae" src="http://headless.local/wp-content/uploads/2024/05/easy-pod-replacement.webp" hover_enabled="0" sticky_enabled="0"][/et_pb_image][et_pb_text _builder_version="4.25.0" _module_preset="default" theme_builder_area="post_content" hover_enabled="0" sticky_enabled="0"]

    For the 0.25 ohm mesh coil I ran 12 Monkeys Origins: Papio – a 70/30 PG/VG mix with no issues at all.

    These pods/coils wick well – even chain vaping.

    Read more: VG VS PG In E Liquid: All You Need To Know

    Pros

    • Stunning design
    • Superb build and materials
    • Compatible with most Orion coils
    • x5 power levels
    • Top airflow
    • Easy top fill
    • That 0.25ohm coil!
    • Should be competitively priced

    Cons

    • Coils can be a pain to remove / replace
    • Airflow can be hit and miss on some pods
    • No 0.25 ohm mesh coil in the box!

    Final Review Verdict

    I’m smitten!

    Actually I’ve been smitten with the Orion range full stop.

    I love the look – the feel – the ease of use and trust me adding the x5 power levels to the Quest Pro has made the almost perfect vape device.

    It’s almost a sacrilege to call the Lost Vape Orion Q Pro a pod kit or even a pod mod!

    Lost Vape set the standard for this design and many others have tried to follow – none of which I’ve tried I hasten to add.

    However and even with just a little bit of tinkering under the deck and the inclusion of those sexy stabwood panels, they’ve created the almost perfect vape kit.

    The flavour from all the coils is very very good indeed.

    However that 0.25ohm mesh coil lifts this to a whole new level – outstanding even.

    So…is my quest for the perfect stealthy sexy and stylish vape device over?

    For now it most definitely is.

    Highly recommended and then some – but don’t forget those coils when you buy it!

    [/et_pb_text][et_pb_code _builder_version=”4.25.0″ _module_preset=”default” theme_builder_area=”post_content” hover_enabled=”0″ sticky_enabled=”0″]Share On:[Sassy_Social_Share][/et_pb_code][/et_pb_column][/et_pb_row][/et_pb_section]
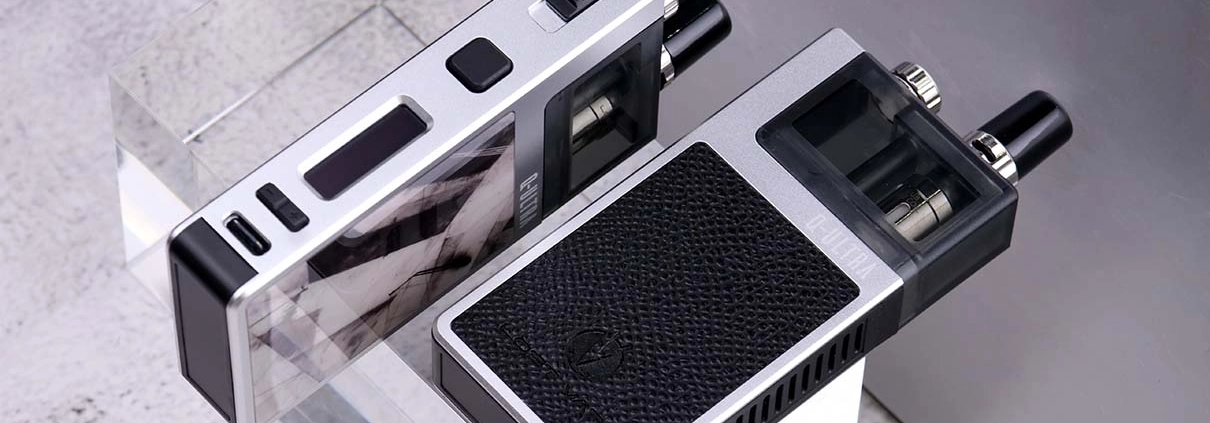
  • COMPARISON OF LOST VAPE ORION SERIES POD KIT

    COMPARISON OF LOST VAPE ORION SERIES POD KIT

    [et_pb_section fb_built=”1″ _builder_version=”4.25.0″ _module_preset=”default” background_color=”#f8f8f8″ hover_enabled=”0″ global_colors_info=”{}” sticky_enabled=”0″][et_pb_row _builder_version=”4.25.0″ _module_preset=”default” hover_enabled=”0″ global_colors_info=”{}” sticky_enabled=”0″][et_pb_column type=”4_4″ _builder_version=”4.25.0″ _module_preset=”default” global_colors_info=”{}”][et_pb_text _builder_version=”4.25.0″ _module_preset=”default” hover_enabled=”0″ global_colors_info=”{}” sticky_enabled=”0″]

    COMPARISON OF LOST VAPE ORION SERIES POD KIT

    [/et_pb_text][/et_pb_column][/et_pb_row][et_pb_row column_structure="1_4,1_4,1_4,1_4" _builder_version="4.25.0" _module_preset="default" hover_enabled="0" border_width_bottom="1px" global_colors_info="{}" border_color_bottom="#e1e1e1" sticky_enabled="0"][et_pb_column type="1_4" _builder_version="4.25.0" _module_preset="default" global_colors_info="{}"][et_pb_image src="http://headless.local/wp-content/uploads/2024/05/12333.webp" alt="lost vape" _builder_version="4.25.0" _module_preset="default" global_colors_info="{}"][/et_pb_image][et_pb_text _builder_version="4.25.0" _module_preset="default" global_colors_info="{}"]

    ORION DNA GO

    [/et_pb_text][/et_pb_column][et_pb_column type="1_4" _builder_version="4.25.0" _module_preset="default" global_colors_info="{}"][et_pb_image src="http://headless.local/wp-content/uploads/2024/05/23333.webp" alt="lost vape" _builder_version="4.25.0" _module_preset="default" global_colors_info="{}"][/et_pb_image][et_pb_text _builder_version="4.25.0" _module_preset="default" global_colors_info="{}"]

    ORION Q

    [/et_pb_text][/et_pb_column][et_pb_column type="1_4" _builder_version="4.25.0" _module_preset="default" global_colors_info="{}"][et_pb_image src="http://headless.local/wp-content/uploads/2024/05/allcolor.webp" alt="lost vape" _builder_version="4.25.0" _module_preset="default" global_colors_info="{}"][/et_pb_image][et_pb_text _builder_version="4.25.0" _module_preset="default" global_colors_info="{}"]

    ORION PLUS

    [/et_pb_text][/et_pb_column][et_pb_column type="1_4" _builder_version="4.25.0" _module_preset="default" global_colors_info="{}"][et_pb_image src="http://headless.local/wp-content/uploads/2024/05/MC20-colors.webp" alt="lost vape" _builder_version="4.25.0" _module_preset="default" global_colors_info="{}"][/et_pb_image][et_pb_text _builder_version="4.25.0" _module_preset="default" global_colors_info="{}"]

    Q-PRO

    [/et_pb_text][/et_pb_column][/et_pb_row][et_pb_row _builder_version=”4.25.0″ _module_preset=”default” global_colors_info=”{}”][et_pb_column type=”4_4″ _builder_version=”4.25.0″ _module_preset=”default” global_colors_info=”{}”][et_pb_text _builder_version=”4.25.0″ _module_preset=”default” global_colors_info=”{}”]

    Comparison table of Lost Vape Orion Series Pod Kit

    [/et_pb_text][et_pb_code _builder_version=”4.25.0″ _module_preset=”default” hover_enabled=”0″ sticky_enabled=”0″]

    PUBLISHED DATE Oct 10th,2018 Jan 3th,2019 Aug 25th,2019 Nov 2th,2019
    Nov 2th,2019 Dimensions: 93mm x 37mm x 13.5mmM
    Weight: 87g
    Pod Capacity: 2ml
    Battery: 950mAh Li-po
    Dimensions: 93mm x 37mm x 13.5mm
    Weight: 87g
    Pod Capacity: 2ml
    Battery: 950mAh Li-po
    Dimensions: 93mm x 37mm x 13.5mm
    Weight: 87g
    Pod Capacity: 2ml
    Battery: 950mAh Li-po
    Dimensions: 93mm x 37mm x 13.5mm
    Weight: 87g
    Pod Capacity: 2ml
    Battery: 950mAh Li-po
    POWER LEVELS Three outputs,
    up to 15W
    full-battery output,
    up to 17W
    Five outputs,
    up to 22W
    Five outputs,
    up to 24W
    CHIPSET Evolv DNA GO Chipset Quest Chipset Updated Evolv DNA GO Chipset Updated Quest Chipset
    COILS AVAILABILITY ORION 0.25ohm Vapor Pod
    ORION 0.5ohm Flavor Pod
    ORION Q 1.0ohm Pod
    Q-PRO 1.0ohm Coil
    ORION 0.25ohm Vapor Pod
    ORION 0.5ohm Flavor Pod
    ORION PLUS 0.25ohm Mesh Coil
    ORION PLUS 0.5ohm Regular Coil
    ORION 0.25ohm Vapor Pod
    ORION 0.5ohm Flavor Pod
    ORION Q 1.0ohm Pod
    ORION PLUS 0.25ohm Mesh Coil
    ORION PLUS 0.5ohm Regular Coil
    Q-PRO 1.0ohm Regular Coil
    COLOR OPTIONS Carbon fiber Panel Series(5 color)
    a. Silver-carbon fiber
    b. Gold- carbon fiber
    c. Blue- carbon fiber
    d. Purple – carbon fiber
    e. Black – carbon fiber
    Ocean Panel Series: (6 color)
    a. Silver- Ocean Scallop
    b. Blue- Ocean Scallop
    c. Purple- Ocean Scallop
    d. Black-Ocean Scallop
    e. Gold – Abalone
    f. Purple – Phenix
    Weave Panel Series(5 color):
    a. Silver-Weave
    b. Gold- Weave
    c. Blue- Weave
    d. Purple – Weave
    e. Black – Weave
    Honeycomb Panel Series(5 color)
    a. Black-Ocean
    b. Gold-Dazzling
    c. Blue- Aurora
    d. Rainbow – rainbow
    e. SS – Fantasy
    Ocean Panel Series: (7 color)
    a. Silver-abalone
    b. Black- abalone
    c. Blue- abalone
    d. Gold- abalone
    e. Rainbow -abalone
    f. Silver- white Pearl
    g. Blue- white Pearl
    Resin& Stabwood Panel Series(4 color)
    a. Black- Stabwood
    b. Blue – Stabwood
    c. Silver- Stabwood
    d. Gold- Stabwood
    Carbon fiber Panel Series(5 color)
    a. Silver-carbon fiber
    b. Gold- carbon fiber
    c. Blue- carbon fiber
    d. Purple – carbon fiber
    e. Black – carbon fiber
    Ocean Panel Series: (6 color)
    a. Silver- Ocean Scallop
    b. Blue- Ocean Scallop
    c. Purple- Ocean Scallop
    d. Black-Ocean Scallop
    e. Gold – Abalone
    f. Purple – Phenix
    Full Stabwood Panel Series(3 color)
    a. Black-Stabwood
    b. Red- Stabwood
    c. Blue Stabwood
    Weave Panel Series(5 color):
    a. Silver-Weave
    b. Gold- Weave
    c. Blue- Weave
    d. Purple – Weave
    e. Black – Weave
    Honeycomb Panel Series(5 color)
    a. Black-Ocean
    b. Gold-Dazzling
    c. Blue- Aurora
    d. Rainbow – rainbow
    e. SS – Fantasy

    [/et_pb_code][et_pb_code _builder_version=”4.25.0″ _module_preset=”default” hover_enabled=”0″ sticky_enabled=”0″]Share On:[Sassy_Social_Share][/et_pb_code][/et_pb_column][/et_pb_row][/et_pb_section]
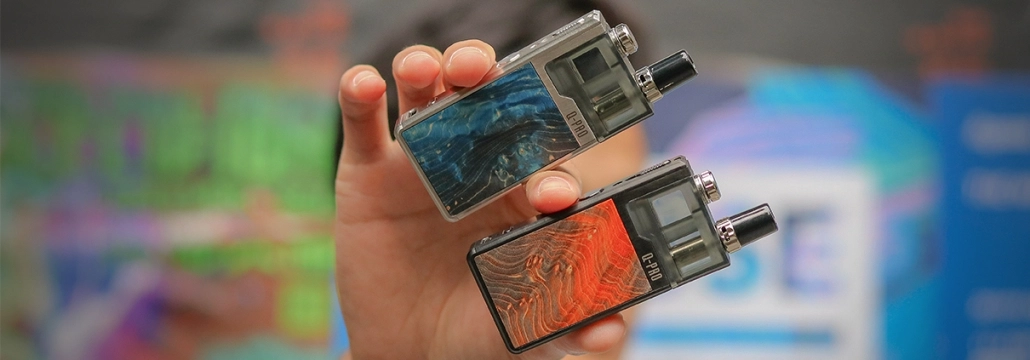
  • Lost Vape Orion DNA Plus Review

    Lost Vape Orion DNA Plus Review

    [et_pb_section fb_built="1" _builder_version="4.25.0" _module_preset="default" background_enable_color="off" global_colors_info="{}"][et_pb_row _builder_version="4.25.0" _module_preset="default" global_colors_info="{}"][et_pb_column type="4_4" _builder_version="4.25.0" _module_preset="default" global_colors_info="{}"][et_pb_image src="http://headless.local/wp-content/uploads/2024/05/ddd.webp" alt="lost vape" align="center" _builder_version="4.25.0" _module_preset="default" global_colors_info="{}"][/et_pb_image][et_pb_text _builder_version="4.25.0" _module_preset="default" global_colors_info="{}"]

    Lost Vape Orion DNA Plus Review

    /in News/by Administrator

    [/et_pb_text][et_pb_text _builder_version=”4.27.4″ _module_preset=”default” hover_enabled=”0″ global_colors_info=”{}” sticky_enabled=”0″]

    Lost Vape Orion DNA Plus Review – Have They Improved An Already Awesome Pod Kit ?

    Replaceable Coils – An Upgrade to the DNA Go Chip – 5 Power Levels and 15 Stunning Designs

    The Lost Vape Orion Plus pod kit is an upgrade to the hugely popular – and copied – original device and now features replaceable coils.

    [/et_pb_text][et_pb_image src="http://headless.local/wp-content/uploads/2024/05/lost-vape-orion-plus-dna-pod-kit-review-e1567158637696.webp" alt="lost vape" _builder_version="4.25.0" _module_preset="default" global_colors_info="{}"][/et_pb_image][et_pb_text _builder_version="4.25.0" _module_preset="default" global_colors_info="{}"]

    The company is known for creating stunning designed mods that on the whole perform exceptionally well thanks to the use of the DNA chips.I reviewed the original Orion DNA Go pod kit and rated it as the best pod kit out there, and the cheaper Orion Q, as to if the Plus has knocked it off top spot we shall see.I’ve had the pleasure and privilege to review some of Lost Vape devices including the awesome Triade DNA 250c – the Furyan Mechanical Squonker and of course the stunning Paranormal DNA250C.Most recently and before the company moved to brand spanking new offices and factory came the release of the Lost Vape Lyra AIO kit which Gaz aka the Flat Cap Vaper quite enjoyed.

    What Can We Expect From the Lost Vape Orion Plus Pod Kit?

    This is an extremely smart looking set-up with a powerful internal 950mAH battery.As we’ve seen it features replaceable coils: 0.25ohm mesh and a 0.5ohm regular – and is a 2ml juice capacity suitable for both freebase and nicotine salt e-liquids.

    [/et_pb_text][et_pb_image src="http://headless.local/wp-content/uploads/2024/05/lost-vape-orion-plus-pod-kit-review.webp" alt="lost vape" _builder_version="4.25.0" _module_preset="default" global_colors_info="{}"][/et_pb_image][et_pb_text _builder_version="4.25.0" _module_preset="default" global_colors_info="{}"]

    We’ve now got x5 power settings from the original’s 3, whilst the Replay and Boost features are of course included – more on those later.OK, this was sent to me free of charge direct from Lost Vape – thank you – and as always my thoughts and opinions are my own and unswayed by freebies.

    Inside the Box

    [/et_pb_text][et_pb_image src="http://headless.local/wp-content/uploads/2024/05/lost-vape-orion-plus-box.webp" alt="lost vape" _builder_version="4.25.0" _module_preset="default" global_colors_info="{}"][/et_pb_image][et_pb_text _builder_version="4.25.0" _module_preset="default" global_colors_info="{}"]

    • 1 x Lost Vape Orion Plus DNA Pod Kit (0.25ohm mesh coil pre-installed)
    • 1 x Lost Vape Orion Plus 0.5ohm Coil
    • 1 x Orion Plus Lanyard
    • 1 x Micro USB Cable
    • 1 x User Manual

    [/et_pb_text][et_pb_image src="http://headless.local/wp-content/uploads/2024/05/lost-vape-orion-plus-contents.webp" alt="lost vape" _builder_version="4.25.0" _module_preset="default" global_colors_info="{}"][/et_pb_image][et_pb_text _builder_version="4.25.0" _module_preset="default" global_colors_info="{}"]

    Specs and Features

    • Powered by Upgraded DNA Go Chip
    • 950mAh built-in battery & 2ml refillable pod cartridge
    • 10W-22W
    • 93x37x13.5mm
    • 0.25Ω mesh coil – 0.5Ω regular coil
    • Replay and Boost function
    • 5 adjustable power levels
    • Patent pending temperature limiting technology
    • Top adjustable airflow design
    • Top refilling design
    • Mouth to lung & direct to lung vaping
    • x15 colour choices

    Quick Start Guide

    [/et_pb_text][et_pb_image src="http://headless.local/wp-content/uploads/2024/05/replace-pod.webp" alt="lost vape" _builder_version="4.25.0" _module_preset="default" global_colors_info="{}"][/et_pb_image][et_pb_text _builder_version="4.25.0" _module_preset="default" global_colors_info="{}"]

    • Charge device – USB port is on the bottom side of the device under a cap
    • To fill unscrew the metallic cap
    • Leave to prime for 5 minutes to allow the coil to soak uop the juice
    • To replace coil unscrew the mouthpiece and push down
    • To replace pod – use release switch and pull up
    • To install pod line up runners pull-down release switch and slot in
    • x5 clicks of the fire button to turn on and off
    • x2 clicks of the fire button checks battery level
    • Twist ring on mouthpiece to alter airflow

    [/et_pb_text][et_pb_image src="http://headless.local/wp-content/uploads/2024/05/coil-swap.webp" alt="lost vape" _builder_version="4.25.0" _module_preset="default" global_colors_info="{}"][/et_pb_image][et_pb_text _builder_version="4.25.0" _module_preset="default" global_colors_info="{}"]

    Power Levels – Boost and Replay

    There are x5 power levels on the Orion X Plus and all are suitable for the replaceable coil pods.Whilst the pods from the original Orion DNA Go are compatible, the coils inside those are designed for just the first two power levels, white and blue.

    [/et_pb_text][et_pb_image src="http://headless.local/wp-content/uploads/2024/05/Orion_Plus_DNA_Pod_System_Kit_power_level.webp" alt="lost vape" _builder_version="4.25.0" _module_preset="default" global_colors_info="{}"][/et_pb_image][et_pb_text _builder_version="4.25.0" _module_preset="default" global_colors_info="{}"]

    Select the power level by pressing the adjustment button towards the bottom side of the device, and scroll through white/blue/red/yellow and purple.

    [/et_pb_text][et_pb_image src="http://headless.local/wp-content/uploads/2024/05/adjust-button.webp" alt="lost vape" _builder_version="4.25.0" _module_preset="default" global_colors_info="{}"][/et_pb_image][et_pb_text _builder_version="4.25.0" _module_preset="default" global_colors_info="{}"]

    Once you’ve found your perfect vape – hold down the adjustment button for 3 seconds until the light turns green and this puts you in Replay mode, recreating your perfect vape.To disable Replay mode hold the adjustment button down for 3 seconds – easy!

    [/et_pb_text][et_pb_image src="http://headless.local/wp-content/uploads/2024/05/Orion_Plus_DNA_Kit_replay-boost.webp" alt="lost vape" _builder_version="4.25.0" _module_preset="default" global_colors_info="{}"][/et_pb_image][et_pb_text _builder_version="4.25.0" _module_preset="default" global_colors_info="{}"]

    The 0.25ohm mesh coil can be vaped between 13 to 22w – whilst the regular 0.5ohm coil can be vaped between 10 and 18wBoost mode gives the coils an instant zap of more power to get them heated up nicely and of course, all settings and power levels can be fiddled with within the Escribe software – I’ll go into more detail on that shortly.

    Key Features

    For such a little device there appears to be a lot going on – trust me it’s pretty simple to pick up and vape though!The Orion Plus is as the name suggests the updated version of the original and includes not only replaceable coils, but an upgraded version of the DNA Go chip.

    [/et_pb_text][et_pb_image src="http://headless.local/wp-content/uploads/2024/05/orion-plus-and-orion.webp" alt="lost vape" _builder_version="4.25.0" _module_preset="default" global_colors_info="{}"][/et_pb_image][et_pb_text _builder_version="4.25.0" _module_preset="default" global_colors_info="{}"]

    It has a 950mAH internal battery and the pods are 2ml capacity wherever you are in the world.

    [/et_pb_text][et_pb_image src="http://headless.local/wp-content/uploads/2024/05/fill-port.webp" alt="lost vape" _builder_version="4.25.0" _module_preset="default" global_colors_info="{}"][/et_pb_image][et_pb_text _builder_version="4.25.0" _module_preset="default" global_colors_info="{}"]

    As I’ve already shown the pods from the original do fit but can only be used at the two lower power levels else the coil will burn out.The chip automatically recognises the resistance of the coils and sets the power level accordingly – you can, of course, override this. Should your pod run dry the chip also has a simple temperature control feature that kicks in and should stop any dreaded dry hits.By adjusting the airflow you can use this as either an Mouth to Lung (MTL) or Direct to Lung (DTL) vape – I’ll look at this in more detail in moment.

    [/et_pb_text][et_pb_image src="http://headless.local/wp-content/uploads/2024/05/escribe-dna-go.webp" alt="lost vape" _builder_version="4.25.0" _module_preset="default" global_colors_info="{}"][/et_pb_image][et_pb_text _builder_version="4.25.0" _module_preset="default" global_colors_info="{}"]

    I have found no issues with the out of the box settings however and as I’ve mentioned you can hook it up to to the Evolv Escribe software and tinker to your heart’s content.

    Note: You can upgrade the original Orion DNA Go device to the new software and just buy the new pods and coils. However the pods from the Orion Q are not compatible.

    Lost Vape Orion Pod Compatibility

    [/et_pb_text][et_pb_image src="http://headless.local/wp-content/uploads/2024/05/lost-vape-orion-pod-compatibility.webp" alt="lost vape" _builder_version="4.25.0" _module_preset="default" global_colors_info="{}"][/et_pb_image][et_pb_text _builder_version="4.25.0" _module_preset="default" global_colors_info="{}"]

    Design and Build Quality

    My original Orion DNA GO has been through the wars and used very regularly and is looking a bit battered and I’ve lost one of the screws holding it all together!

    The new Orion Plus feels to be made of more solid stuff however using it this past few days I have managed to scratch the sides a little so maybe the paint finish isn’t as tough as one would like.

    [/et_pb_text][et_pb_image src="http://headless.local/wp-content/uploads/2024/05/scratch.webp" alt="lost vape" _builder_version="4.25.0" _module_preset="default" global_colors_info="{}"][/et_pb_image][et_pb_text _builder_version="4.25.0" _module_preset="default" global_colors_info="{}"]

    The pods slide in and out easily enough however do make sure they are slotted in tight – a couple of times they’ve separated in my pocket – no leaks but I did have to clean fluff from them ?

    The adjustable airflow on the mouthpiece is tight but after a few turns loosen up enough but without wandering around in your pocket. Pulling the coils out can be a bit of a pain – they are in there very tight which is good, but swapping the one installed did make my girly fingers a little sore – ah bless lol.

    [/et_pb_text][et_pb_image src="http://headless.local/wp-content/uploads/2024/05/lost-vape-orion-puls-review.webp" alt="lost vape" _builder_version="4.25.0" _module_preset="default" global_colors_info="{}"][/et_pb_image][et_pb_text _builder_version="4.25.0" _module_preset="default" global_colors_info="{}"]

    As to the design – wow – just wow!

    As you can see I received the black stabwood/resin version which is bloody gorgeous and trust me, the photos online don’t do it justice – in the flesh, it’s a bloody stunner!

    [/et_pb_text][et_pb_image src="http://headless.local/wp-content/uploads/2024/05/carbon-fibre.webp" alt="lost vape" _builder_version="4.25.0" _module_preset="default" global_colors_info="{}"][/et_pb_image][et_pb_text _builder_version="4.25.0" _module_preset="default" global_colors_info="{}"]

    There’s a variety of colours and combos to choose from – 15 in all – with the stabwood series – carbon fibre collection and the awesome abalone set – so plenty to choose from and all look very sexy indeed.

    [/et_pb_text][et_pb_image src="http://headless.local/wp-content/uploads/2024/05/abalone-orion-plus-pod-kit.webp" alt="lost vape" _builder_version="4.25.0" _module_preset="default" global_colors_info="{}"][/et_pb_image][et_pb_text _builder_version="4.25.0" _module_preset="default" global_colors_info="{}"]

    How Does the Lost Vape Orion Plus Perform?

    The Orion Plus comes with x2 replaceable coils so let’s look at how each one performs.

    For the taste test I used my current go-to juice Contra from Wick Liquor an 80/20 PG/VG blend as I wanted to see how well it wicked. Incidentally Lost Vape says the pods/coils are suitable for both freebase nicotine and nic salts.

    0.25 Mesh Coil

    [/et_pb_text][et_pb_image src="http://headless.local/wp-content/uploads/2024/05/mesh-coil.webp" alt="lost vape" _builder_version="4.25.0" _module_preset="default" global_colors_info="{}"][/et_pb_image][et_pb_text _builder_version="4.25.0" _module_preset="default" global_colors_info="{}"]

    I began on the two lower power levels with the airflow wide open and to be honest there was not a lot going on – a very weak vape!

    However, bumped up to the red setting – which is around 18w and things began to improve and got even better at the higher purple setting of 22w, giving very good flavour but token vapour – a cloud chucker this isn’t!

    I was able to get a very good lung hit – once I’d adjusted my vape style to the tiny mouthpiece! When sub-ohm vaping I do like a 810 drip tip!

    Closed off almost shut, and this was definitely better for me with richer flavour and a very good tight MTL draw.

    0.5 Regular Coil

    [/et_pb_text][et_pb_image src="http://headless.local/wp-content/uploads/2024/05/regular-coil.webp" alt="lost vape" _builder_version="4.25.0" _module_preset="default" global_colors_info="{}"][/et_pb_image][et_pb_text _builder_version="4.25.0" _module_preset="default" global_colors_info="{}"]

    Again I began on the lower levels of 10 to 11w and again not much was happening, indeed I really had to suck to get any vapour.

    Bumped up to 14 and 16w settings and things as you might expect improved and at the max of 18w I found my happy setting.

    A cool side of warm vape with good flavour but not as tasty as the mesh coil. Once again vapour was minimal so this is one for what you might call considerate vaping ?

    I was able to get a loose lung hit but even at the higher wattage is was a little on the weak side.

    This one is better for a true MTL draw, especially with the airflow shut right down and we’ll look at that next.

    Airflow on the Lost Vape Orion Plus

    Wide-open airflow and on a scale of 1-10 with 10 being extremely airy I’d put this at about an 8.

    Closed right off and this is one heck of a tight vape at about a 1 lol.

    I found a happy medium about a third open for lung hits and about 1/5th open for a nice restricted MTL draw.

    The airflow control is a little stiff, to say the least and your fingers do seem to catch the re-fill cap, but after a couple of days, it’s loosened up.

    Pros

    • Choice of mesh or regular coils
    • Updated DNA Go chip
    • Replay and Boost
    • Easy fill
    • Can be used with previous pods
    • MTL or DTL vape styles
    • Long battery life – day and half vaping
    • Quick charge time of a little over an hour
    • Airflow control
    • Huge choice of colours and materials
    • Feels solid in the hand
    • Good price!

    Cons

    • Paint finish not that solid (on my device)
    • Swapping coils can be a little stiff!

    Final Review Verdict

    I rated the original as one of the best pod kits I’d had the pleasure of using and reviewing – so is the Orion PLus now my go-to?

    In a word yes!

    The flavour off that mesh coil is very good indeed and certainly beats the original pods/coils.

    The vapour is a little weak even using my 80/20 VG PG blend – but this is a smart, you might even say, sophisticated set-up and not one to chuck clouds bro’.

    I love love love the design and was really pleased to receive the black stabwood/resin version – both badass and sexy at the same time ?

    The price point is very good too and I’ve seen this on offer for around the $50 mark – which is a bit of a bargain for such a solid pod kit.

    If you have the original Lost Vape Orion DNA Go or even the Orion Q – the one that comes without the DNA chip – I highly recommend you upgrading if only for that mesh coil – which is a very nice vape indeed.

    Note: I have marked it down slightly for the scratch which could be down to the paint job and also the 0.5ohm coil is not quite there taste-wise. Therefore it’s got the same marks I gave the original Orion DNA Go kit, however, all things considered, it is a much better vape experience with more power options if that makes sense ?

    [/et_pb_text][et_pb_code _builder_version=”4.25.0″ _module_preset=”default” global_colors_info=”{}”]Share On:[Sassy_Social_Share][/et_pb_code][/et_pb_column][/et_pb_row][/et_pb_section]
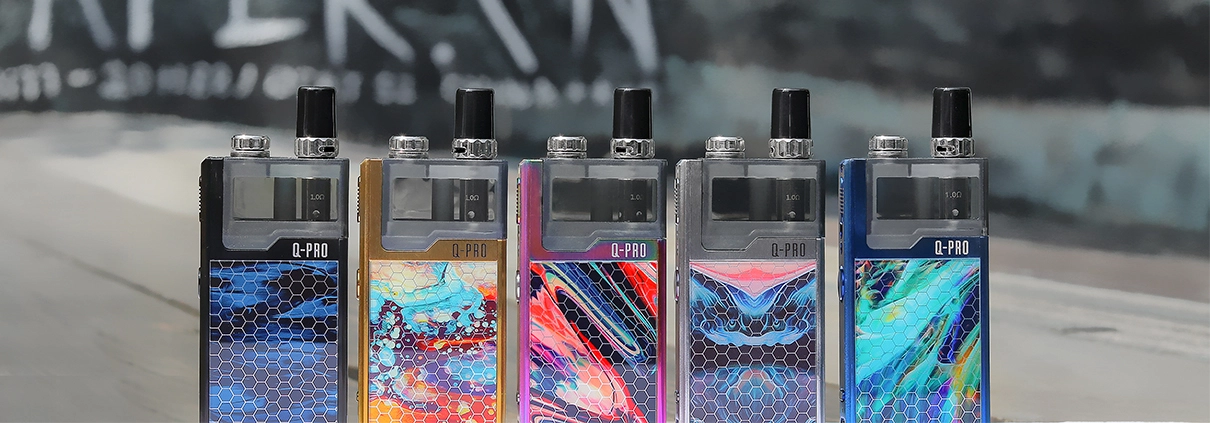
  • Lost Vape Orion Q Review | Half the Price of the GO

    Lost Vape Orion Q Review | Half the Price of the GO

    [et_pb_section fb_built="1" theme_builder_area="post_content" _builder_version="4.25.1" _module_preset="default"][et_pb_row _builder_version="4.25.1" _module_preset="default" theme_builder_area="post_content"][et_pb_column _builder_version="4.25.1" _module_preset="default" type="4_4" theme_builder_area="post_content"][et_pb_image _builder_version="4.25.1" _module_preset="default" theme_builder_area="post_content" alt="lost vape" src="http://headless.local/wp-content/uploads/2024/05/lost-vape-orion-q-800×533-17-of-17-799×423-1.webp" hover_enabled="0" sticky_enabled="0"][/et_pb_image][et_pb_text _builder_version="4.25.1" _module_preset="default" theme_builder_area="post_content" hover_enabled="0" sticky_enabled="0"]

    Lost Vape Orion Q Review | Half the Price of the GO

    /0 Comments/in News/by admin

    Product intro and specs

    The Orion GO was arguably the most important pod vape of last year. Now in 2019, Lost Vape has released the second edition, the Orion Quest (Q). It’s a paired down version of the original Orion Go for a little less than half the price, but without the most unique electronic features of the GO.

    The Orion Q has a 950 mAh internal battery and the power output is set for 17 watts only. No adjustability and no Evolv DNA board. The device comes either by itself with no pods, or you can get the kit that comes with a single 2 mL pod housing a 1.0-ohm Kanthal coil (the only official Quest pod).

    From the outside looking in, there’s virtually no difference between the two versions. What remains for the Quest is the build quality and design. But is that enough to compensate for the lack of all the other features?

    Frame colors: stainless steel, black, blue, gold (all come with carbon fiber panels)

    Specifications

    Kit Content

    Build quality and design

    [/et_pb_text][et_pb_image _builder_version="4.25.1" _module_preset="default" theme_builder_area="post_content" alt="lost vape" src="http://headless.local/wp-content/uploads/2024/05/lost-vape-orion-q-800×533-1-of-17.webp" hover_enabled="0" sticky_enabled="0"][/et_pb_image][et_pb_text _builder_version="4.25.1" _module_preset="default" theme_builder_area="post_content" hover_enabled="0" sticky_enabled="0"]

    As mentioned, the Orion Q is basically the Orion GO with a different chip. If you’re not familiar with the GO, then I’ll discuss the Quest as it is.

    The Orion Q is a quality-built and well-designed pod device. It’s got some heft to it, although it doesn’t interfere with it being an easy carry. It’s a rectangular pod vape made of a stainless-steel chassis and carbon fiber panels. With the thick plastic pod in, the Quest weighs about 85 grams and its dimensions are 93 mm x 37 mm x 13.5 mm. The pod has dual-slotted adjustable airflow from a knurled ring in the base of the proprietary mouthpiece, and a screw-top fill port on the top of the pod. Filling the pod is completely straightforward. You can practically pour juice in it, but because there is a lot of cotton in the pods, I’d recommend waiting at least 15 minutes for these to totally saturate.

    Once the pods are in the device, they’re incredibly secure. There is a track and catch system that the pods go into, and they’re removed from a sliding switch on the side of the device. To insert the pod, angle the base of the pod (the mouthpiece side) to the back of the pod housing; then push down on the on the refill top until you hear a click.

    Under the pod release switch is the circular fire button. It’s raised enough to easily find it without looking, and it’s responsive. Mine has the tiniest bit of rattle, but only when shaking it vigorously.

    Performance

    [/et_pb_text][et_pb_image _builder_version="4.25.1" _module_preset="default" theme_builder_area="post_content" alt="lost vape" src="http://headless.local/wp-content/uploads/2024/05/lost-vape-orion-q-800×533-4-of-17.webp" hover_enabled="0" sticky_enabled="0"][/et_pb_image][et_pb_text _builder_version="4.25.1" _module_preset="default" theme_builder_area="post_content" hover_enabled="0" sticky_enabled="0"]

    The performance of the Orion Q is good and I enjoy using it, but it’s not as straightforward as it sounds. Although the pods vape quietly, and they don’t leak, spit or pop, some have far too much cotton in the coil. That increases the time to saturate and the time to break-in the coil. Sometimes a good portion of the first fill tastes off, to the point of it tasting like a burnt hit. Also, all that cotton means the flavor carry-over lasts longer than normal.

    After the coils break-in, the pods last me each about a week (or 1-2 refills a day) before the taste drops off. The 1.0-ohm Q pods vape well with flavor and vapor, but mainly with DL lung hits or restricted lung hits with high VG juice. It seems counter-intuitive to do DL hits on a 1.0-ohm pod, but it works. Unfortunately, the Q doesn’t do so well for me with MTL — the 17 watts on the 1.0-ohm coil make the tip uncomfortably hot when taking successive hits when the airflow is closed off.

    For compatibility of the Orion GO pods on the Q, the 0.25-ohm GO pods fall outside of the resistance range of the Q and won’t fire them. The 0.5-ohm pods will work, but the performance has been hit or miss for me lately. Sometimes it vapes well and other times it gets too hot. Also note that the Q pods will work on the Orion GO, but you will have to go into Escribe and fiddle with the settings.

    Originally I said the 0.5-ohm GO pods were working fine on my Q, and they were. But lately they’ve been getting too hot and now it’s not something that I’m doing. Now I only use the Q pods on the Q.

    Battery

    The front/bottom micro USB port is placed well (unlike with the GO), but it’s solely meant for charging. In the GO, the oddly-placed bottom port is also for firmware updates and using Escribe.

    There is a small LED right above the micro USB port that represents the charge status in three colors:

    • Light blue: 64-100
    • Purple: 18-64%
    • Red: 0-17%

    As for battery life, it’s been great whether I’m using the 0.5-ohm (GO) or the 1.0-ohm (Q) pods. Even when my light is red, it seems to last much longer than the percentage available. I always get more than a day, and sometimes two full days out of a charge. I clocked the charge at more than 90 minutes while plugged into my computer — too bad there is no pass-thru charging because it’s a long charge. When the charging is complete, the light will be blue (so don’t wait for it to go out). All in all, if you want a little pocket-carry device that will last, the battery life of the Q is a plus!

    Pros / Cons

    • Well made
    • Pods are totally secure
    • Long-lasting battery
    • Easy to fill
    • Pod release switch is a pleasure to use
    • Adjustable airflow
    • Decent flavor and vapor

    [/et_pb_text][et_pb_image _builder_version="4.25.1" _module_preset="default" theme_builder_area="post_content" alt="lost vape" src="http://headless.local/wp-content/uploads/2024/05/lost-vape-orion-q-800×533-17-of-17.webp" hover_enabled="0" sticky_enabled="0"][/et_pb_image][et_pb_text _builder_version="4.25.1" _module_preset="default" theme_builder_area="post_content" hover_enabled="0" sticky_enabled="0"]

    • 1.0-ohm Q pods don’t work well for MTL
    • Some of the pods have too much cotton in the coil
    • Long charge and no pass-thru

    Verdict

    For half the price of the GO, the Q is a solid buy. The Q has its faults, but it’s better than the majority of pod vapes on the market. I hope Lost Vape cuts down on the cotton in the pods because that’s the one thing I think hurts the vape quality. But even with that, for a long-lasting battery plus a quality build and design, the Q is hard to beat. It doesn’t have all the electronic features of the GO, but not everyone needs or wants all of that, especially for the higher cost.

    I feel confident in recommending the device as it is for DL or restricted lung hits with low mg e-juice, and I would recommend not using this with high strength nic salts. Also, remember that Lost Vape is saying to only use the Q pods with the Q.

    [/et_pb_text][et_pb_image _builder_version="4.25.1" _module_preset="default" theme_builder_area="post_content" alt="lost vape" src="http://headless.local/wp-content/uploads/2024/05/2020.webp" hover_enabled="0" sticky_enabled="0"][/et_pb_image][et_pb_code _builder_version="4.25.1" _module_preset="default" theme_builder_area="post_content" hover_enabled="0" sticky_enabled="0"]Share On:[Sassy_Social_Share][/et_pb_code][/et_pb_column][/et_pb_row][/et_pb_section]